 |  | | SPAM FILTERED |
|  |  |  | |  | |  | |  | |  | | | SCRIPT: Tony Lee
ART: Andrew Currie (art), Charles Kirchoff (colour)
LETTERING: Shawn Lee
EDITOR: Denton J. Tipton ISSUE: 1
COVER DATE: January 2011
IN DOCTOR WHO ADVENTURES: First Foot First - Sub-Species
IN DOCTOR WHO MAGAZINE The Professor, the Queen and the Bookshop - The Screams of Death
REPRINTS: Reprinted by IDW in the ‘graphic novel’ Doctor Who II Volume 1: The Ripper, July 2011, and then again in August 2011 in a 100 Penny Press edition from IDW, and yet again in December 2013 in The Girl Who Waited, The Boy Who Lived.. When Rory uses the TARDIS’ telephone to go online, the TARDIS is suddenly inundated with holographic spam mail and an annoying talking stapler. In order to get rid of it, the Doctor is forced to shut down all systems, causing the TARDIS to crash onto the planet Phayke. It will take three hours for the systems to reset, but unfortunately, as hard-light hologram Council Elder Image explains, the planet is due to be destroyed by the Scroungers in only one hour. The Scroungers want slaves, but Phayke’s population are all holographic and cannot leave the planet, so the Scroungers plan to destroy them instead. After an encounter with a phishing copy of the Doctor, the real Doctor bundles Amy and Rory into the TARDIS. He then meets with the representative of the Scroungers, who destroys Image. The Doctor gives him the slip but is once more confronted by the talking stapler, which gives him an idea. Aboard the TARDIS, the spam mail takes a nasty turn and Amy and Rory find themselves cornered by monsters. When the stapler appears, the Doctor suggests they listen to its advice. The stapler isn’t spam or junk mail, it genuinely wants to help, and it gets rid of the monsters. The Scroungers, meanwhile, have been hoodwinked by the phishing copy of the Doctor who, along with several other holograms, has promised them great wealth. They leave Phayke in search of promised riches. | | | 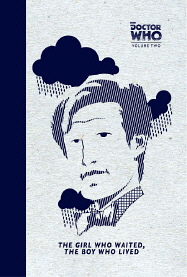 | | | 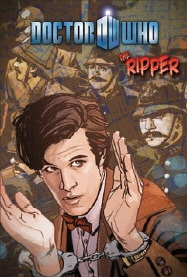 | | | | 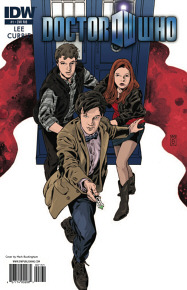 | | | | | | | | | | | ALTERED VISTAS SAYS:
There’s some fun to be had here, the plotting is ingeniously detailed, the characterisation is pitch perfect, and the artwork, whilst obviously photo-referenced is generally very good with great likenesses and excellent use of colour, but the actual story amounts to very little - it’s like an episode from a science fiction sitcom - so ultimately this strip feels disposable and lightweight. By the way, I look forward to the day when an IDW release has more variant covers than it does actual pages.
|
|
 |  | | RIPPER’S CURSE |
|  |  | | SCRIPT: Tony Lee
ART: Richard Piers Rayner (art, Issue 2, pages 1-19), Horacio Domingues (art, Issue 2, pages 20-21), Tim Hamilton (art, Issue 2, page 22, then Issues 3 - 4), Phil Elliot (colour)
LETTERING: Shawn Lee (Issues 2-3), Neil Uyetake (Issue 4)
EDITOR: Denton J. Tipton ISSUES: 2 - 4
COVER DATES: February - April 2011
IN DOCTOR WHO ADVENTURES: Sub-Species - The Peace Strike
IN DOCTOR WHO MAGAZINE The Screams of Death - Do Not Go Gentle Into That Good Night
REPRINTS: Reprinted by IDW in the ‘graphic novel’ Doctor Who II Volume 1: The Ripper, July 2011, and yet again in December 2013 in The Girl Who Waited, The Boy Who Lived. Whitechapel, London, 30 September 1888, and prostitute Elizabeth Stride is lured into Dutfield’s Yard where she is first paralysed and then murdered by a shape-shifting alien. Her body is discovered at 1am. The TARDIS arrives moments later. The Doctor detects Kryon radiation from the Matrua Nebula with the sonic screwdriver and chases a man from the murder scene. He almost catches the man, who reveals himself to be a reptilian creature in a shimmer suit, Amy and Rory, meanwhile, passing themselves off with the psychic paper as Miss Marple and Inspector Clouseau, meet Sir Charles Warren. Amy realises that Elizabeth’s death was the work of Jack the Ripper, that this is the night of his double murder and that they can still save Catherine Eddowes. Leaving Rory to meet Inspector Frederick Abberline of Scotland Yard, Amy and a policeman race off. However, they are too late to prevent the murder and Amy disturbs the alien killer. It paralyses her, but she is saved by the Doctor. The killer escapes and, as policemen arrive in Mitre Square, the Doctor is accused of the murder of Catherine Eddowes and, despite Amy’s protestations, arrested as Jack the Ripper. Rory and a suspicious Abberline arrive in time to see the Doctor arrested, but Abberline realises the truth and has the Doctor released. Examining the body, the Doctor believes the creature is a Ju’wes who feed on adrenaline. The Doctor says the Ripper’s victims are fixed points in time - they cannot save any of them, and he has one more kill to make. However, their talk is interrupted by a policeman who has found a clue - writing on a wall which says ‘The Juwes are not the men tht will be blamed for nothing’. At the crime scene, they are observed by the shapeshifter who notes Amy’s name. Amy is determined that they can save the Ripper’s last victim and runs off to warn Mary Warner. Rory gives chase leaving the Doctor alone by the TARDIS where he is paralysed by the creature. It has detected his alien makeup and reveals that it is not a Ju’wes but a Re’nar, natural enemy of the Ju’wes. Amy finds Mary Kelly at the Ten Bells Pub in Whitechapel but her story is dismissed. The Doctor, meanwhile, visits Sir Charles Warren, having realised he is really a disguised Ju’wes hunting the Re’nar killer. His chat convinces the Doctor that Mary Kelly can be saved and, using the TARDIS, he jumps ahead one month to the night of her murder. However, a long night staking out her home with Abberline (who reveals that Sir Charles resigned earlier that day) ends with a surprise - Mary Kelly, not Mary Warner is the Ripper’s next victim, and when Amy encounters the Re’nar, she learns that she will become his sixth. Travelling to the present day, the Doctor and Rory discover that the Ripper now killed at least twelve, including Amy. Racing back to 1888, the Doctor realises they only have a short while before time accepts this new set of events as history. Amy, meanwhile, is being held captive by Mac’Atyde, the Re’nar, along with Mary Warner. He will kill her as a warning to the Doctor, then take his TARDIS. The TARDIS lands in Spitalfields, 1888, where they are met by Abberline - and Sir Charles, who the Doctor persuades to reveal his true nature. Sir Charles says he will return the real Charles Warren once the Ripper has been caught and returned to his homeworld to stand trial for these murders and many more war crimes. Amy and Mary escape, just as Rory and the Doctor locate them. In his reptilian Ju’wes form, Sir Charles attempts to apprehend Mac’Atyde, but the Re’nar reveals that he plans to suck all of London through a time portal, a crime for which the Ju’wes will be blamed.. The Doctor and Rory locate the portal device, but the Doctor cannot disable it, only minimise its effect. The Ju’wes sacrifices himself to push Mac’Atyde through the portal which then closes. Back in modern day London, the Doctor, Amy and Rory note that history is back on track, despite the wrong Mary dying, but the Doctor says the universe takes care of itself. |
|
 |  | | A FAIRYTALE LIFE |
|  |  |  |  | |  | | | | SCRIPT: Matthew Sturges
ART: Kelly Yates (pencils), Steve Bird, Brian Shearer (1, sole credit for art 2-4), Rick Ketcham (inks), Rachelle Rosenberg (colour)
LETTERING: Neil Uyetake (1), Shawn Lee (2-4)
EDITOR: Denton J. Tipton ISSUES: 1 - 4
COVER DATES: April - July 2011
IN DOCTOR WHO ADVENTURES: Chasing Rainbows - Missing in Action
IN DOCTOR WHO MAGAZINE Do Not Go Gentle Into That Good Night - Apotheosis
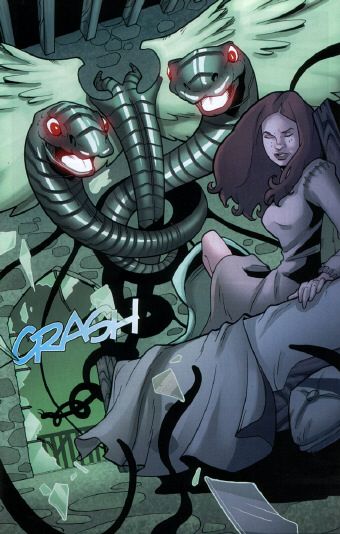
REPRINTS: Reprinted by IDW in the ‘graphic novel’ A Fairytale Life, November 2011 (cover as first issue). Amy wants to visit a fairytale kingdom so the Doctor takes her to Caligaris Epsilon Six in the year 7704, one of the most renowned holiday planets in the Earth Empire. Ignoring a warning light on the console, they venture out into the immersive experience, but something is wrong. Talking to two young boys called Joon and Elim have lost their sister Aurelia to the Serpentines, creatures that come from the skies and abduct anyone who is sick or hurt, taking them to the Dread Tower. The boys also have no knowledge of holiday planets, having lived here all their lives. The Doctor takes readings and realises he has arrived in the 79th Century - the holiday is long over. Aurelia’s father Sir Callum appeals to the king to let him go in search of his daughter, but the king refuses. However, the court wizard Gwydion sees the Doctor and Amy in his scrying crystal, and Sir Callum goes to detain them at once. Locating an access panel, the Doctor discovers that the planet is in quarantine - the warning light on the console was warning of biological contamination. They are apprehended by Sir Callum and Gwydion, but escape and run for the TARDIS. However, the TARDIS is no longer there. The Doctor and Amy are apprehended by Sir Callum and |
|
 | taken before the king, who is in discussion with Master Osric. Osric has dissected a dead fairy and discovered it to be a complex machine. The king will not allow the Doctor or Sir Callum to go to the Dread Tower to recover Aurelia, but places the Doctor and Amy, who is starting to feel unwell, into Callum’s c are. The Doctor learns that the king has ruled for generations and that the biological contamination, which the locals call the Pest, has no cure and affects only adults. Amy is abducted by the Serpentines. Meanwhile, Master Osric is killed as he experiments on the fairy. The Doctor persuades Sir Callum to disobey the king and accompany him to the Dread Tower. It is here that Amy has been taken, her injuries healed by a machine. However, it diagnoses her with Recombinant Yersinia Pestis and, for the safety of the population, sentences her to death. Amy is saved by Aurelia. The king blames the Doctor for Osric’s murder and calls for his immediate arrest. At Sir Callum’s house, the Doctor has rewired a robotic duck to locate Amy. However, as they set off on their quest they are confronted by Gwydion. The Doctor disables his wizard staff with the sonic screwdriver and he and Sir Callum ride out. In the tower, Aurelia takes Amy to meet Ora and the other people imprisoned there. The Doctor’s robotic duck locates her and she is able to communicate with him, but the conversation is cut short when the Doctor and Sir Callum are attacked by first a chimera and then wyvurns, unicorns, gnomes and goblins. However, they eventually reach the Dread Tower and the gates open to reveal a fire-breathing dragon. But the dragon is controlled by the king who pulls a weapon on them both. The Doctor identifies the Dread Tower as the main building of the theme park. The king has been using the advanced healthcare facilities to sustain himself for the 150 years of his reign. Whilst Callum fights the king, the Doctor, pursued by the dragon, runs into the main building to liberate the prisoners. There he meets up with Amy and Aurelia. They shelter in the master control room where the Doctor views the last entry in the immersive holographic security feed. This shows Chief Administrator Aethelred destroying the vaccine for the Pest, allowing the adults population to die and raising the children as the first generation of his loyal subjects. Leaving Amy in Aurelia’s care, the Doctor confronts Aethelred and learns that he did what he did to protect his people from the plagues, famines and wars ravaging the empire. Callum kills him leaving the Doctor to confront the dragon, but it is Amy with a large gun that finishes the robotic beast before collapsing. The Doctor carries her to the TARDIS, which was taken into the tower by scavenger drones programmed to remove anachronisms, and cures her in the TARDIS medical bay. Believing the king’s motives to protect the people from the horrors of the universe to be sound, the Doctor elects not to cure the disease or lift the quarantine, but Amy makes him realise that it is not his choice to make. He synthesises enough of the antibiotic to cure all the people before he and Amy depart. |
| |
 |  | | THEY THINK IT’S ALL OVER |
 |  |  |  | |  |  |  |  | | SCRIPT: Tony Lee
ART: Mark Buckingham (inks), Charles Kirchoff (colour)
LETTERING: Neil Uyetake
EDITOR: Denton J. Tipton ISSUE: 5
COVER DATE: May 2011
IN DOCTOR WHO ADVENTURES: The Peace Strike - Reality Cheque
IN DOCTOR WHO MAGAZINE Forever Dreaming
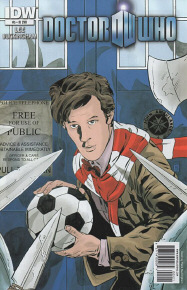
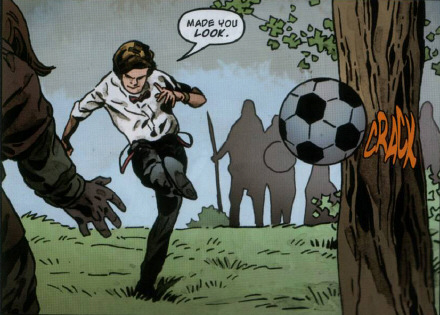
REPRINTS: Reprinted by IDW in the ‘graphic novel’ Doctor Who II Volume 2: When Worlds Collide, January 2012, and yet again in December 2013 in The Girl Who Waited, The Boy Who Lived. The Doctor, Amy and Rory try to travel to Wembley Stadium in 1966 to watch a football match between England and Germany. The TARDIS lands in the exact location - but in the 9th Century. The TARDIS crew, accompanied by Anglo-Saxons, visit Lord Wemba and his wife Frida, who thank the Doctor for helping King Alfred the Great escape from Somerset. Rangar the Strong, his son Henghist and several Vikings walk in to discuss peace with the Anglo-Saxons, but Henghist has other ideas. He plans to control the Anglo-Saxon ‘dogs’. His father hits him and tells him to obey him. Frida, away from the others, tells Amy that she and Rory should leave while they can, as Henghist has expressed great interest in her. Amy assures her she'll be fine. Meanwhile, Rory walks past a room where Henghist and Rangar are arguing. At the end of the argument, Rangar disowns Henghist and Henghist stabs his father in a fit of rage. Rory tells the Doctor, Amy and Wemba before Henghist enters and pretends that Rangar was killed by the Saxons. Henghist tries to take Amy and Frida as payment for his father's death, but the Doctor has another idea: he challenges him and one of his solders to a game of football. If he wins, he gets Frida, Amy and Wemba's land. If he loses, the Vikings leave. The Doctor and Rory win the football match, much to Henghist's displeasure. He wants to kill the women and burn the village, but Rory punches him, knocking him out cold. After their goodbyes, the TARDIS crew travel to Wembley Stadium 1966, to watch the World Cup | | | | ALTERED VISTAS SAYS:
The Doctor’s claim that the TARDIS has landed ‘a thousand years too early’ is clearly wrong as that would set the story in 966 (ie. the 10th Century). The Doctor’s later assertion that only Wessex still resists the Vikings sets the date fairly firmly as 870, which is 1096 years before the England-German Would Cup of 1966. However, Ranger later talks about the Danelaw which wasn’t established until 886, so the history is quite shaky. Unfortunately, the story is pretty shaky too, seemingly more an excuse to celebrate football and Wembley and probably the fact that Matt Smith used to be a footballer. Forgettable, but the artwork is quite nice.
| | | |  | |  | |  | | | | |
| |
 |  | | WHEN WORLDS COLLIDE |
 |  | | IMAGINARY FRIENDS - KEVIN
Kevin is an automated artificial intelligence (a robot) who just happens to be dinosaur-shaped. First and foremost an actor, Kevin joined the TARDIS crew in an attempt to broaden his horizons and find a better place to stay, though quite how something the size of a Tyrannosaurus Rex gets through the TARDIS doors is never properly explained. Your Destiny Awaits implies that Kevin travels in the TARDIS for just one week, having adventures in the Wild West with Sitting Bull, Los Angeles where he poses as a police detective, and an alien planet populated by blue-skinned aliens, Just before visiting Space Station E11 Nebula Base for the events of Space Squid, the TARDIS visited Tokyo, Japan, where Kevin was mistaken for Godzilla. Aboard Nebula Base, Kevin quickly established himself as a peace-keeping force, defeated the Space Squid and eventually joined the crew as the new security officer, ending his brief stint as a time traveller.
|
|  | | |  | | | SCRIPT: Tony Lee
ART: Matthew Dow Smith (inks), Charles Kirchoff (colour)
LETTERING: Chris Mowry (6), Neil Uyetake and Shawn Lee (7), Shawn Lee (8)
EDITOR: Denton J. Tipton ISSUES: 6 -8
COVER DATES: June - August 2011
IN DOCTOR WHO ADVENTURES: Reality Cheque - The Moon of Lost Hope
IN DOCTOR WHO MAGAZINE Forever Dreaming - The Child of Time
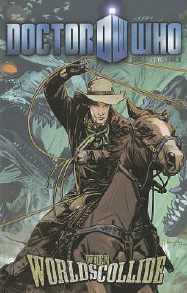
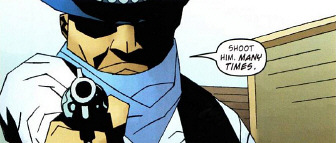
REPRINTS: Reprinted by IDW in the ‘graphic novel’ Doctor Who II Volume 2: When Worlds Collide, January 2012, and yet again in December 2013 in The Girl Who Waited, The Boy Who Lived. The Doctor, Amy and Rory are messing about in what appears to be the Wild West when they receive a visit from Rok Soo’Gar. Rok explains that they are on Multiworld, where, due to a fluctuation rift, he is able to craft using hard light holosettings and artificial animatronics any time his guests desire, all half a second out of phase with each other so they can co-exist in the same space. Showing them several of the time zones, Rok introduces them to Kevin, an automated artificial intelligence shaped like a T. Rex, but he is distracted by news of an unexpected ship approaching. The ship is a Sontaran warship, damaged in a battle with the Rutans, commanded by Major Drak of the 13th Sontaran Battle Fleet, who requests permission to land and make repairs. Rok grants him permission, but changes his mind when he learns they are venting fluronic gas, which could destabilise the fluctuation rift. However, Drak refuses to listen and brings his ship into land. There is a huge explosion and the time zones merge, distributing the Doctor, Amy and Rory in different places. Rory finds himself in a Wild West jail believed to be Billy the Kid and facing imminent hanging. The Doctor is in Prehistoric times, but the explosion has knocked Kevin into character and he is now a ferocious dinosaur. Amy, meanwhile, finds herself in a wartime Parisian cafe, but when the Gestapo arrive, they are Sontarans. The Doctor is saved from Kevin by a woman on a flying carpet named Lisa Everwell, a holidaymaker from an Arabian adventure, but they are pursued by Caliph Sul’taran and his men... who are also Sontarans. Rory encounters Sontarans masquerading as Sonny Taran and his gang, but when he pulls a magic sword from a stone, they flee in fear. Unusual behaviour for Sontarans. Amy, meanwhile, is forced to flee when the Sontarans overhear her mentioning the Doctor. Both the Doctor and Rory witness the Sontarans suddenly vanishing, but it is the latter, shortly after befriending someone called Lisa, who discovers the TARDIS. Amy is found by another Lisa Everwell and also discovers the TARDIS in a Parisian backstreet. The vanished Sontarans are confronted by Major Drak. Each commander is a splinter of himself, but he has used the advanced technology at his disposal to teleport them all here - an invincible army ready to conquer the multi-world. Meanwhile, the Doctor, Amy and Rory all stumble into the TARDIS and realise they have all met Lisa. All of them have become fractured in time, the Doctor deduces, as more splinters of themselves pile into the TARDIS. The Doctors fire a beam of traganic energy into the middle of the fluronic particle matter, merging all the zones into one. However, stepping out of the TARDIS, the Doctor is greeted by Lisa - and twelve versions each of himself, Amy and Rory. The Doctors argue about who should take command. When Kevin turns up, the Doctor uses his sonic screwdriver to return him to his affable self. They will need to do this to all the artificial intelligences because every Sontaran will also have been split into twelve - an army is coming. But he is concerned that Rok is nowhere to be found. The artificial intelligences argue amongst themselves until Rory, wielding his magic sword, manages to unite them, but Lisa warns that the Sontarans are already mobilising. Whilst Rory and the artificial intelligences defend the TARDIS, the Doctors attempt to set things to rights. One of the Lisas sacrifices herself so that Amy can get to the Doctor with vital information - whilst everyone else is split into twelve, there are thirteen different types of Sontaran. The Doctor heads out to confront the seemingly original Drak, in reality Rok who hoped the Sontaran ship would destabilise the rift thus allowing him to become an imaginator of an entire world. The Sontarans died at the moment of the explosion, leaving only shadows. However, they are substantial enough to take Rory’s sword and destroy Rok, returning the world to normal. Lisa takes over the running of Multiworld. Kevin elects to join the TARDIS crew. |
|
 |  | | SAN DIEGO CONVENTION SPECIAL |
 | |  | |  | | | | SCRIPT: Matthew Dow Smith
ART: Horatio Domingues (pencils), Andre Ponce (inks), Phil Elliot (colour)
LETTERING: Shawn Lee
EDITOR: Denton J. Tipton ISSUE: Con Special
COVER DATE: July 2011
IN DOCTOR WHO ADVENTURES: Missing in Action
IN DOCTOR WHO MAGAZINE Apotheosis
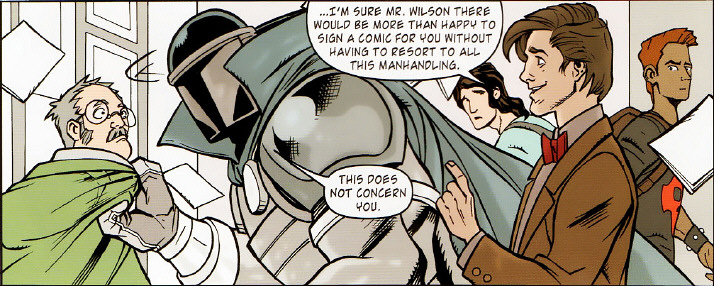
REPRINTS: None The Doctor, Amy and Rory land at the San Diego Comic-Con to meet the creator of Rory’s childhood comic book hero Captain Rocket. The man in question is Hamilton Wilson, a figure once so beloved that copies of Captain Rocket were placed in the Explorer probes. However, whilst Rory is awed by him, a figure in impressive armour attempts to abduct Hamilton. They recognise the figure as an alien and, with Hamilton in tow, run for the service tunnels in the basement beneath the convention hall where they discover an alien device - a Trylonian brain-drain machine. Hiding in a cupboard, the Doctor asks Hamilton why aliens would be after him, but Hamilton says he has no idea - he’s just a washed up old has-been who nobody remembers. Almost caught by the aliens, they run back into the convention hall, but lose Hamilton in the crowd. Disguising themselves with costumes from the convention attendees, the Doctor, Amy and Rory return to the basement armed with fake guns. The aliens surrender and explain that the Trylonians conquered their world and absorbed their knowledge with a brain-drain machine like the one Hamilton is now strapped to. They want his knowledge and his stories to help them defeat the Trylonians, having found a copy of Captain Rocket aboard an Explorer probe. Hamilton says they don’t need to steal his stories, he’ll give them willingly to anyone who wants to listen. Hamilton takes off with the aliens aboard their ship for a new life among the stars. The Doctor is certain his tales will help to save a whole planet. |
|  | | |  | | | ALTERED VISTAS SAYS:
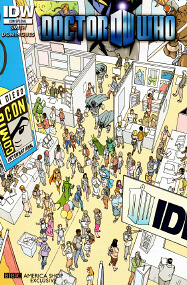
It would be churlish to criticise the story here. What it is is a love letter to Comic-Con for anyone in attendance, and as such it works very well, celebrating creativity and storytelling in general. The artwork is generally attractive, even if the likenesses aren’t especially good, but it has a definite appeal in its strong, crisp lines, and it’s Where’s Wally (or Where’s Waldo if you happen to be American) cover is wonderful.
|
|
 | | |  |
 |  | | RUN, DOCTOR, RUN |
|  |  | | SCRIPT: Joshua Hale Fialkov
ART: Blair Shed
LETTERING: Shawn Lee
EDITOR: Denton J. Tipton REPRINTS: Reprinted by IDW in the ‘graphic novel’ Doctor Who II Volume 3: It Came from Outer Space, January 2012, and yet again in December 2013 in The Girl Who Waited, The Boy Who Lived (see cover below). Exiting the TARDIS, the Doctor finds himself falling upwards. He lands on top of an alien who accuses him of destroying his masterpiece. The alien’s audience agrees. The Doctor is chased through a nightmarish Escher-esque landscape by the aliens who are gravitational shifters. The Doctor realises the aliens are living on a gaseous ball. He offers to fix it so that up is always up and down always down, but the aliens aren’t interested so the Doctor leaves. |
| |
 |  | | ALTERED VISTAS SAYS:
Aside from the desire to show lots of crazy space-bending Escher-style antics, I can’t really see a point to this strip. It’s also, at sixteen pages, much longer than it really needs to be. The artwork is very nice though.
|
|
 |  | | DOWN TO EARTH |
 | |  | |  | | | | SCRIPT: Matthew Dow Smith
ART: Mitch Gerads
LETTERING: Shawn Lee
EDITOR: Denton J. Tipton REPRINTS: Reprinted by IDW in the ‘graphic novel’ Doctor Who II Volume 3: It Came from Outer Space, January 2012, and yet again in December 2013 in The Girl Who Waited, The Boy Who Lived. Rural England and Harold Lumley returns home from the local shop to find the Doctor waiting for him. Using the sonic screwdriver, the Doctor disables Harold’s perception filter and demands to know who Harold really is and why he is here. The alien, Lum-Tee, is a Trylonian, a race with a habit of invading other worlds. Lum-Tee was engaged in a space battle against the Zorian homeworld when the TARDIS appeared and stopped the fighting. His ship damaged, Lum-Tee made it to Earth where he has spent fifty years rebuilding his ship. But Earth is now his home, why would he want to leave it or destroy it? However, he never lost the urge to fly, but he can’t because the villagers would all see and realise what he is. He would lose his friends. The Doctor makes some adjustments to the perception filter so that it covers not just Lum-Tee but also his ship. The locals see an old WWII fighter or a crop duster. The Doctor isn’t going to make Harold go home because it seems to him that Harold is already there. | | | ALTERED VISTAS SAYS:
Complimented by beautiful artwork, this strip manages to pack quite an emotional punch with its simple message of finding the place where you belong. It has a very special atmosphere and the colour palette and use of light really helps to give it an air of lazy summer melancholy. The Trylonians also get a mention in the San Siego Convention Special.
|
| |
 |  | | TUESDAY |
 |  |  |  | | SCRIPT: Dan McDaid
ART: Dan McDaid, Deborah McCumiskey (colour assist)
LETTERING: Shawn Lee
EDITOR: Denton J. Tipton REPRINTS: Reprinted by IDW in the ‘graphic novel’ Doctor Who II Volume 3: It Came from Outer Space, January 2012, and yet again in December 2013 in The Girl Who Waited, The Boy Who Lived. The Doctor is imprisoned in Gibraltar, 1958, by Sir Reginald Troupe, who plans to become King of England and Emperor of the World. Lashing up a device from objects in his cell, the Doctor contacts Amy, but she is leading a resistance force on the vanguard ship of the Vroon war fleet. Rory, meanwhile, is desperately trying not to be crowned as the king of England when Troupe and a force of Vroon warriors enter and demand his immediate execution. Troupe has made a pact with the Vroon - they can use Earth as a beachhead in their war with the Noorv in return for him taking what he believes is rightfully his. Amy, having taken the ship, contacts the Doctor who gives her some co-ordinates where she must fire the ship’s secondary pulse cannon. This blasts the wall of his cell allowing him to escape. Dodging guards he makes it back to the TARDIS and travels to St. Paul’s cathedral to confront Troupe. Troupe gives orders for the fleet to flatten London, but the fleet does not respond because Amy has staged a workers revolt aboard the ships. Troupe is arrested by the police, the workers’ rebellion took the Vroon soldiers away and everything was returned to normal. That was Tuesday. | | | ALTERED VISTAS SAYS:
Revelling in its own absurdity, this witty strip manages to tell quite a large adventure in remarkably little space. The artwork isn’t to my taste, looking somewhat messy and occasionally making it difficult to see what’s going on, but we all have styles we like and dislike and the style here is at least appropriate to the tone.
| |
| |
 |  | | YOUR DESTINY AWAITS |
 | | |  | | | ALTERED VISTAS SAYS:
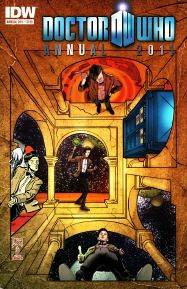
Not so much a story as a prelude to Space Squid, but the artwork is very nice and it’s hard not to feel for Kevin, even as the strip highlights all the reasons why a comedy dinosaur aboard the TARDIS is probably not a good idea. Amy has just one line in the whole of this story.
|
| | |
 |  | | SPACE SQUID |
|  |  |  |  |  |  | | |  | | SCRIPT: Tony Lee
ART: Josh Adams (art), Rachelle Rosenberg (colour)
LETTERING: Neil Uyetake
EDITOR: Denton J. Tipton ISSUE: 9
COVER DATE: September 2011
IN DOCTOR WHO ADVENTURES: Vacuum Packed - The Secret Star Trail
IN DOCTOR WHO MAGAZINE The Child of Time
REPRINTS: Reprinted by IDW in the ‘graphic novel’ Doctor Who II Volume 3: It Came from Outer Space, January 2012, and yet again in December 2013 in The Girl Who Waited, The Boy Who Lived. Aboard Space Station E11 Nebula Base, acolytes of the Space Squid are gathering for the End of Days. The Doctor, Amy, Rory and Kevin arrive just as a sceptical Commander Katic and Major Fillion give docking permission for the ship ‘Heaven’s Tentacle’, containing the High Priest, to dock. The acolytes get restless and Katic orders the release of Petty Officer Dever to keep them under control. However, Dever is killed by a gunman and it is Kevin who steps in to maintain crowd control. The High Priest calls for control and summons the Space Squid. The Doctor reviews the security footage of the ship’s arrival and realises that the appearance of the space squid was carefully engineered. The creature is a Coleiodean, but much larger than a normal one. Coleiodeans love to suck brains, but not before they have controlled them. Rory and Amy, meanwhile, talk to the High Priest and learn that Dever was killed because he was the only non-human security on board. Just as the Doctor devises a plan to stop the squid, it exerts mind control over the whole station, leaving only the Doctor and Kevin immune. Rory and Amy are given the bomb that will destroy the station. The Doctor, declaring himself the Anti-Squid calls for a meeting, then quickly gets the pieces of his plan in order, including making Kevin a set of body armour. Meeting with the Priest, the Doctor restores Amy and Rory to normal, proving that the squid is over-stretching itself. Kevin flies in to distract it further and, when it screams, he inserts a syringe into its tongue, rendering it unconscious. The threat over and the squid destined for a distant world, Kevin elects to remain on the station as the new security officer. | | |  | | | | | | 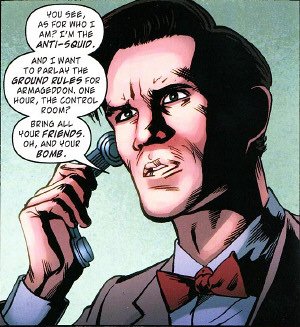 | | | ALTERED VISTAS SAYS:
The artwork is generally very good and the likenesses extremely accurate, though the overall style sometimes suffers by losing the backgrounds and thus showing characters floating in a void. Beep the Meep gets a name check, which is cute, but this story really doesn’t amount to much. It appears to have no point other than to get rid of Kevin, all the station characters are thoroughly underdeveloped and the conclusion is something of a letdown too. It doesn’t even have anything to say about religion. Disappointing.
| | |
|
 |  | | BODY SNATCHED |
 | | | SCRIPT: Tony Lee
ART: Matthew Dow Smith (art), Charles Kirchoff (colour)
LETTERING: Shawn Lee
EDITOR: Denton J. Tipton ISSUES: 10 - 11
COVER DATES: October - November 2011
IN DOCTOR WHO ADVENTURES: Agent 99 - Dog of War
IN DOCTOR WHO MAGAZINE The Child of Time
REPRINTS: Reprinted by IDW in the ‘graphic novel’ Doctor Who II Volume 3: It Came from Outer Space, January 2012, and yet again in December 2013 in The Girl Who Waited, The Boy Who Lived. The Trans-Universal Union in the 45th Century, a futuristic post office, and the Doctor picks up a letter from the Horse Lord of Khan asking for help. He has been locked up on the hospital asteroid Bedlam. The TARDIS arrives and the Doctor explains that all the patients are biogrowers, perfect servants grown from pods. However, the biogrowers bodies live for a hundred years, but their brains die after fifty, leaving them in a catatonic state. That is when they are shipped to Bedlam. Passing themselves off as auditors from homeworld, the Doctor, Amy and Rory meet Dr Rubin. Nurse Hella takes Rory and Amy to examine the biogrowers and she explains that Rubin has devised a means to transfer living minds into the biogrowers’ empty brains. Sneaking away to intensive care, Amy discovers biogrowers who have had a variety of aliens transferred into their minds, including the Horse Lord of Khan, who explains that he wrote a letter to the Doctor but never sent it - Sol Rubin must have sent it to lure the Time Lord here. Rory, meanwhile, realises that the biogrowers aren’t as vegetative as everyone insists and two minds inhabiting the same body could lead to a riot. He and Amy race to warn the Doctor, but the Doctor is already aware of Rubin’s scheme, as Rubin plans to transfer the Doctor’s mind into a biogrower body and then inhabit the Doctor’s body himself. However, as Amy and Rory race to stop the experiment, Amy and the Doctor both touch the transference machine at the same time. This creates a feedback surge throughout the hospital and the shockwave awakens the duel personalities in all the test subjects. The subjects begin to riot as Rory helps the Doctor and Amy back to the TARDIS. There he realises that they have swapped bodies, and with the transference machine destroyed, there may be no way back. | | |  | | | Amy’s mind in the Doctor’s head is dangerous. They have a limited time to set things right. Rubin claims he has a second mind transference device on Bedlam, and he will switch them back if they help him control the riot. The rioters, meanwhile, decide to storm the reactor. Realising that Rubin was sedating the biogrowers with ethylene and that this might stop the rioting, Nurse Hella organises an ethylene reaction through Rubin’s backup network, but the biogrowers seize the reactor and threaten to destroy the complex unless all the human staff submit themselves for body transfer. Khan finds the Doctor and accompanies Rubin as he crosses the asteroid to another lab to complete the ethylene reaction. However, someone has deactivated the forcefield protecting the walkway between the two buildings and Rubin suffocates leaving Khan to cross alone. There he informs the Doctor that it was he all along who lured the Doctor here intending to inhabit his body. He will be immortal. The biogrowers, meanwhile, initiate the self-destruct sequence on the reactor. Amy in the Doctor’s body has a respiratory bypass system and uses it to cross to the second control room where she knocks Khan unconscious and reactivates the forcefield allowing the others to cross in safety. Rory and Hella fire the ethylene pulse just as the reactor countdown reaches zero. The biogrowers are returned to their vegetative state, the network reboots and the energy build up is routed through the transference machine, switching Amy and the Doctor back into their own bodies. Nurse Hella will remain on Bedlam, removing the alien minds from the biogrowers and housing them in artificial housing until bodies can be cloned. The biogrowers will then be slowly awoken and reintegrated into society. | | | ALTERED VISTAS SAYS:
An engrossing and slightly chilling first half gives way to far too much technobabble and a twist that both fails to convince and fails to ramp up the tension, as it is resolved with a simple punch. The artwork is serviceable but not terribly appealing.
|
| |
 |  | | SILENT KNIGHT |
|  | | |  | | | SCRIPT: Tony Lee
ART: Paul Grist (art), Phil Elliott (colour)
PRODUCTION ASSISTANCE: Shawn Lee
EDITOR: Denton J. Tipton ISSUE: 12
COVER DATE: December 2011
IN DOCTOR WHO ADVENTURES: Harvest of Doom - Humans Aren’t Just for Christmas
IN DOCTOR WHO MAGAZINE The Child of Time - The Chains of Olympus
REPRINTS: Reprinted by IDW in the ‘graphic novel’ Doctor Who II Volume 3: It Came from Outer Space, January 2012, and yet again in December 2013 in The Girl Who Waited, The Boy Who Lived (see cover below). Landing in a snowy landscape, the Doctor discovers Santa Claus beset by roboforms wanting to steal his sack. The Doctor and Santa destroy a couple of roboforms but the survivors make off with his sack in a small ship. The Doctor and Santa give chase in a reindeer-pulled sleigh. When they are close, the Doctor sonics the roboform with the sack and he drops it allowing Santa to retrieve the toys. This exhausts the sonic. Worse, Santa’s reindeer are in a bad way after the chase, so the Doctor helps Santa deliver his gifts by TARDIS instead, including one for Amy and Rory. After another brief encounter with the roboform, Santa gives the Doctor a special present - a brand new sonic. |
|  | | |  | | | ALTERED VISTAS SAYS:
I usually complain about Paul Grist’s artwork, but here it is perfectly suited to the story and works extremely well. There is only one line of dialogue in the whole strip - inevitably the Doctor wishing a happy Christmas to ‘all of you at home’ - but as a festive diversion, this is all good fun. By the way, this is not the first time Santa has appeared in the comic strip as he also met the First Doctor in A Christmas Story.
|
|
 |  | | AS TIME GOES BY |
|  |  |  |  | |  | | | SCRIPT: Joshua Hale Fialkov
ART: Matthew Dow Smith (art), Charlie Kirchoff (colour)
LETTERING: Shawn Lee
EDITOR: Denton J. Tipton ISSUES: 13 - 16
COVER DATE: January - April 2012
IN DOCTOR WHO ADVENTURES: Humans Aren’t Just for Christmas - Finders Keepers
IN DOCTOR WHO MAGAZINE The Chains of Olympus
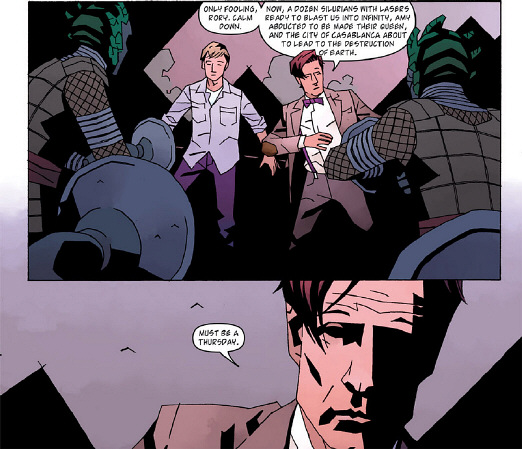
REPRINTS: Reprinted by IDW in the ‘graphic novel’ Doctor Who II Volume 4: As Time Goes By, June 2012, and yet again in December 2013 in The Girl Who Waited, The Boy Who Lived. Landing in Casablanca in 1941 where the Doctor wants to buy a fez, Rory is soon arrested on suspicion of the theft of confidential documents and murder. Going to the cafe to speak to the police captain, the Doctor and Amy are in time to see Nazis enter, a shot ring out and a man get arrested. Amy’s pleas for Rory’s release fall on deaf ears, but the Captain insists instead on showing her and the Doctor the nightlife of Casablanca. Rory, meanwhile, shares a cell with the man arrested in the cafe. The Captain receives news of the deaths of two men in the prison, Rory being one of them. However, when the actual plan to kill the two men is belatedly carried out, Rory temporarily scuppers it and, though his cellmate is shot, he reveals one of his would-be assassins as Silurians in human guise. Running through a strange fog to save her husband, Amy arrives at the cells, with the Doctor, to find Rory held at gunpoint. Disabling the assailants with his sonic screwdriver as Rory’s cellmate dies of his wound, the Doctor says that Silurians killing humans so overtly is a very bad thing. He locates a Silurian video log which mentions Project Heavy Air, something the Doctor connects to the strange fog. Leaving Amy and Rory to guard the Silurian prisoners, the Doctor goes to investigate the fog and ends up back at the cafe. Talking to the police captain, he tells him of the attempted invasion by the Silurians and then takes him back to the cells to prove it, but all they find locked up are Amy and Rory with a station filled with Silurians, and the Captain is one too. He proposes, to avoid unnecessary bloodshed, making Amy queen of the new Silurian Empire. | | | 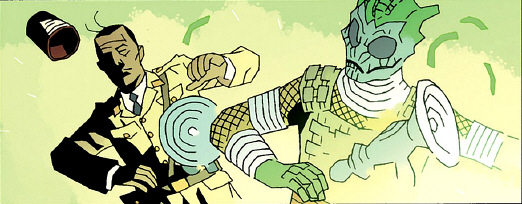 | | | The Doctor and Rory escape the Silurians using their own underground travel discs, but the discs only take them to some freshly dug tunnels close to the surface. The Doctor realises that the Silurians plan to destroy Casablanca with a massive earthquake. Amy, meanwhile, is imprisoned by the captain in a police van, but the Doctor and Rory rescue her and explain the Silurian plan to turn the fog they have created into torrential rain which will cause the tunnels beneath the city to collapse causing earthquakes and tidal waves. Cornered by the Captain, the Doctor realises he cannot bring himself to destroy the humans because he has realised that humans are an equal species. He begins to help them, but is arrested as a traitor to the Silurian cause. His replacement pulls the lever to start the deluge. Escaping custody, the Doctor, Amy and Rory head down into the Earth to deactivate the rain-making machine. While Amy and Rory distract the guards, the Doctor comes face to face with a Silurian scientist. However, he cannot talk him out of activating the plan, but he has already re-routed the ventilation system to flood the underground chambers. The Silurian guards flee back to their underground city leaving tunnels going straight down which will flood the city and kill hundreds of thousands of Silurians, but the Doctor does some technical trickery that somehow re-routes the water through the TARDIS. He sends the Silurian scientist back to his people having convinced him that it is not yet time for the Silurians to emerge. | | |  | | | ALTERED VISTAS SAYS:
The ‘A’ covers are very nice, especially the first and third ones, but the interior artwork doesn’t even come close to so effectively evoking the time and place, and the look and feel of Casablanca (the film or the place) and is often staggeringly crude. The story isn’t bad and contains some excitement as well as presenting the Silurians as individuals rather than rubber-suited monsters, though I can’t see how the destruction of Casablanca will cause the extinction of all life on Earth. The ending I found extremely confusing and I’m not even convinced that I’ve summarised it correctly as I have no idea what the Doctor actually does. Threading in the events of the film Casablanca is clever, but ultimately just confusing for anyone who hasn’t seen it, resulting in panels and occurrences that appear to have no bearing on the plot.
| |
|
 |  | | ASSIMILATION2 |
 |  |  |  | | SCRIPT: Scott and David Tipton with Tony Lee
ART: J. K. Woodward (art, 1-3, colour, 4-8), The Sharp Brothers (art, 3), Gordon Purcell (pencils, 4-8)
LETTERING: Shawn Lee and Robbie Robbins (1-6), Tom B. Long (7-8)
EDITOR: Denton J. Tipton, Jacen Smith (editorial assists) ISSUES: 1 - 8
COVER DATE: May - December 2012
ON TV: Asylum of the Daleks - The Angels Take Manhattan, The Snowmen
IN DOCTOR WHO ADVENTURES: Buying Time - Snowball!
IN DOCTOR WHO MAGAZINE: Sticks and Stones - Imaginary Enemies
REPRINTS: Reprinted by IDW in the ‘graphic novel’ Star Trek: The Next Generation/Doctor Who Assimilation2, Volumes 1 & 2, October 2012 and February 2013. Delta IV in the United Federation of Planets is attacked and quickly overrun by a combined force of Borg and Cybermen. Only the Prime Minister escapes. The Doctor, Amy and Rory, meanwhile, are in Ancient Egypt in the Pharaoh’s palace exposing the pharaoh’s vizier as an escaped alien criminal. The Doctor traps it in an interdimensional prison cell. After an exceptionally rough landing, the TARDIS next takes them to what appears to be San Francisco, 1941, but the Doctor’s attention is caught by a pale faced android (Data). | | | | 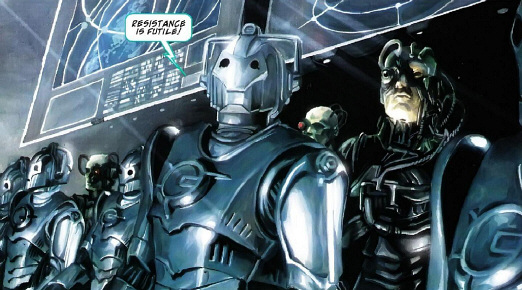 | | | | The Enterprise is on a routine visit to Naia VII. Commander Riker beams down with Worf and Data and meets Captain Ochoa and the amphibian natives the Dai-ai. They tour the mining operation, a difficult and dangerous endeavour as most of the planet is under water, but Captain Picard reveals that they need the minerals urgently in the war effort against the Borg. Back aboard the Enterprise, Riker, Data and Doctor Beverley Crusher go to test the new holodeck. Here, in a bar, they meet the Doctor, Amy and Rory, who they suspect to be glitches in the upgraded system. However, deactivating the hologram reveals them to be real. The Doctor is confused - memories he never had and information he never knew are suddenly in his head. Whilst he and his companions meet Captain Picard, the Enterprise picks up a distress call from Delta IV. As they draw closer they are able to pick up visual sensor transmissions showing a huge fleet of Borg and Cybermen ships. The Enterprise beats a hasty retreat with the enemy ships in pursuit. The Doctor fills Picard in on the Cybermen and Data finds a log entry detailing an encounter between Captain James T. Kirk and the Cybermen on Aprilia III where they were assisted by a man known as the Doctor. The Doctor suddenly remembers this encounter whilst simultaneously remembers not remembering it. In pursuit of some answers, Picard takes him to meet Guinan. | | | 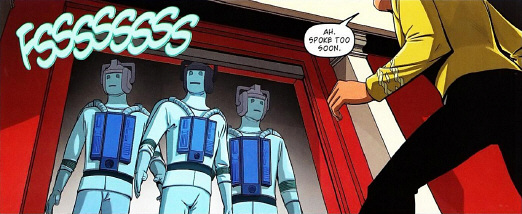 | |
| |
 |  |  |  | | Guinan has a feeling that she and the Doctor know each other but that they shouldn’t. They both sense that the flow of time is disturbed. The Cybermen have brought two universes together to make an alliance with the Borg. The Borg-Cyberman fleet has changed course, now heading away from Earth, after partly assimilating Cogen V. The Enterprise heads to this world and the away team is accompanied by the Doctor and his companions. However, after beaming down, they come under attack from a sentry drone of neither Borg or Cyberman design and find large numbers of Borg and Cybermen casualties. The Doctor deactivates the machine and takes it back to the Enterprise along with Borg and Cybermen bodies for analysis. Study shows that the two forces turned on each other and video from the sentry drone confirms this. They discover Borg ships, all destroyed. Picard and Riker are impressed by the Cybermen, sensing an ally, but the Doctor urges caution. When the Borg contact the Enterprise asking for an alliance against the Cybermen the Doctor is keen to entertain before the Cybermen overrun everything, but Picard is adamant. The Doctor and Guinan attempt to change Picard’s mind, and ultimately succeed, with Amy’s help, by taking him into the future in the TARDIS to show him the fall of the Klingon and Vulcan empires and the ultimate fall of Earth. The Doctor, Amy, Rory, Picard, Riker, Worf and Data beam down to desolate planetoid Tau Lee where they meet a party of Borg led by Conduit and agree to be allies against the Cybermen. The Doctor outlines a plan to catch up with the Cyberfleet heading towards the Borg homeworld and restore the Borg’s executive library that was destroyed by the Cybermen and which has rendered most of the collective inert. To get a copy of the library, he proposes travelling back in time. With Picard and the ship’s counsellor, the Doctor goes to Naia VII to try to get supplies of gold, an effective weapon against the Cybermen, but the humans are unable to help as their agreement with the Dai-ai prevents them from mining for it. Picard begins talks with Seelos, leader of the Dai-ai, but it is the Doctor who swings the deal before travelling back in time with Amy and Rory to the Battle of Wolf 539. There, aboard a Borg cube, they encounter Captain Picard assimilated into the Borg collective as Locutus. | | | 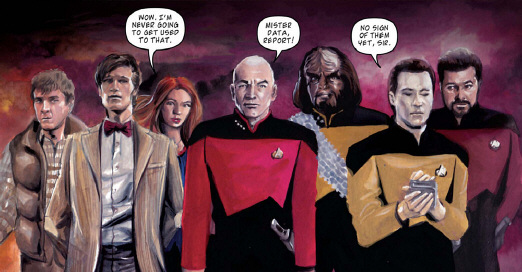 | | | | Locutus ignores the time travellers and they proceed through the Borg ship to a computer terminal where the Doctor copies the executive libraries. As the battle begins, the travellers slip back to the TARDIS and return to the Enterprise. Geordi the engineer has bad news, though, as, despite Borg enhancements suggested by Conduit, the Enterprise cannot achieve sufficient speed to catch the Cyberman fleet before it reaches the Borg homeworld. However, the Doctor suggests boarding the Cybership in the TARDIS. Once aboard, though, they are detected almost immediately despite splitting into two parties and soon find themselves up against the collected might of the Cybermen. | | | | 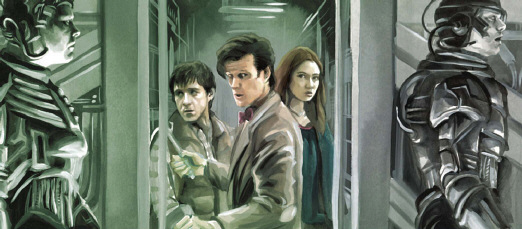 | | | | Worf’s party, which includes Amy and Rory, attacks the engine room and manages to disable the engines. The Doctor’s party, meanwhile, which includes Conduit, Picard and Data, is captured by the Cybermen, but they are rescued by the arrival of the Enterprise firing a gold-infused particle beam. This destroys the Cybermen but not the Cybercontroller who is instead restrained by Data and Conduit. This allows the Doctor to restore the Borg executive libraries. Immediately, the Borg set all Cyberships to self-destruct. They all race back to the TARDIS before the fleet explodes, but then Conduit announces an end to the alliance and attempts to assimilate the TARDIS. However, the TARDIS retreats from the attack, entering Data. Data fights back then Rory and Worf physically throw Conduit into the time vortex, ending the threat. With the Cybermen destroyed, the universes revert to the way they should be and the Doctor, Amy and Rory depart for their own universe. | | | 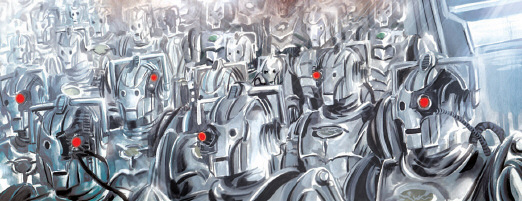 | | | | ALTERED VISTAS SAYS:
I have never been a fan of crossovers (as various reviews in the Seventh Doctor section demonstrate) and I am absolutely not a fan of Star Trek in any of its incarnations. Doctor Who has always been about rebellion and questioning authority, whereas to my mind Star Trek is about enforcing authority. It’s about responsible people in uniforms. However, the writers here seem to have realised this fundamental difference between the two shows and used it to inform their story and the characterisation. In essence, it’s rather like the Doctor teaming up with UNIT, but fundamentally UNIT up to the end of Season 7, where the characters can carry respect equal to that afforded to the Doctor. The Doctor may denounce the Star Trek ethos of entering a situation armed, but Worf is allowed the equally persuasive counter-argument and convinces Amy and Rory to carry guns. Some instalments are a bit thin on plot and meaningful incident and the showdown with the Cybercontroller is rather spoiled by the fact that he talks completely out of character, but it all feels remarkably solid and remains entertaining throughout. The artwork is a bit of a mixed bag. The first three issues are obviously heavily photo-referenced. Things change when Gordon Purcell takes over pencilling duties but, though he can turn in some exceptional work, some of the panels look slightly rushed and lack the accuracy that would have made them stand out. His likeness of Whoopie Goldberg is particularly poor in Issue 4. The flashback to the 1960s incarnation of Star Trek has a pleasingly simplistic style perfectly in keeping with the period ably assisted by accurate and sympathetic colour work. Over all then, a surprisingly successful venture.
| |
| |
 | | |  |
 |  | | IN-FEZ-STATION |
 | | |  | | | ALTERED VISTAS SAYS:
The Fez Sacred Music Festival is a real event, everything else in this strip is pretty much nonsense. The sonic screwdriver can affect something on a planet-wide basis? The Slitheen have convinced the entire population to wear fezzes? Actually, I can believe the first of those more than the second. The art is crude.
|
|  |  | |  | |  | | | | SCRIPT: Len Wein
ART: Matthew Dow Smith (art) Adrian Salmon (colour)
LETTERING: Shawn Lee
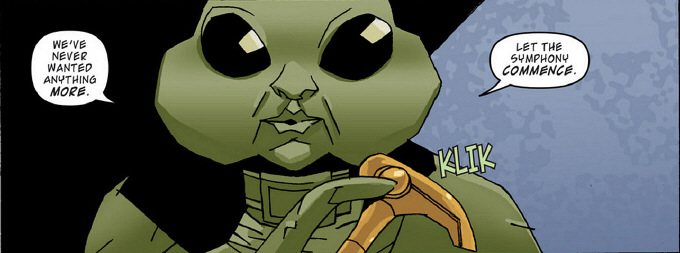
EDITOR: Denton J. Tipton REPRINTS: None The TARDIS lands in the city of Fez in Morocco where the Doctor has come to see the centuries-old Festival of Sacred Music. He notices that everyone, women included, is wearing a fez, and Amy and Rory are soon given one each by a large, farting gentleman. When the music begins, anyone wearing the fez becomes hypnotised and starts walking towards the festival hall, Amy and Rory included. The Doctor tries to interfere but gets knocked out as a result. When he recovers he is tied to a chair in a back room and his opponents are revealed to be the Slitheen. They plan to destroy humanity using sympathetic vibrations. Despite the Doctor’s warning, all around the world, controlled humans begin to sing, searching for the correct destructive note, but the Doctor has used his sonic screwdriver to alter the key frequency so that it no longer affects humans. It does, however, affect the Slitheen and, all around the world, they explode, ending the threat. |
|
 |  | | TIME FRAUD |
|  |  | | SCRIPT: Richard Dinnick
ART: Josh Adams (art) Charlie Kirchoff (colour)
LETTERING: Shawn Lee
EDITOR: Denton J. Tipton REPRINTS: Reprinted in The Eye of Ashaya, Series 3 Volume 2, July 2013 (see cover below). Cuzco, Peru, 1992, two land developers are scared by the sudden appearance of what they believe to be an angry Incan ghost. Meanwhile, en route to Florana, the TARDIS becomes trapped in a time corridor. Elsewhere on the planet Helion, the bird-like Ra’ra’vis are celebrating the approaching Solstice of Pajaro, which heals their elderly and sick, by preparing to travel in time. However, as Entek, the King’s son is transferred, there is a malfunction. Unable to locate Entek, scientist Tigil suggests contacting the Time Lords for help. The Doctor, meanwhile, has found the end of the time corridor in Peru and there found Entek. However, when he contacts Helion to let the Ra’ra’vis know that Entek is safe and to offer his help with their time machine they tell him they already have assistance from Gallifrey. Travelling there directly, the Doctor is almost arrested by chancellery guards under the |
|
 | command of Castellan Bond. He, Entek, Amy and Rory run and take shelter in an abandoned building, but the guards find them. The Doctor uses his sonic screwdriver to reveal them not as Time Lords but as Gizou, shapeshifting mercenaries who have been forced into criminal activity because of a terminal disease affecting their people. The Doctor arranges for the sick Gizou to share in the healing power of the solstice if they turn against Bond. They do so and Bond is revealed as a time agent called Captain Scott Thrower who infected the Gizou in the first place. All he wants is to use the solstice to rejuvenate himself. However, the Doctor with help from the Gizou has tinkered with the solstice energy and Thrower is reverted to a boy. He attempts to use his vortex manipulator and is apparently vaporised. However, he is instead transported to Scotland in 1965. Here he is found by Captain Jack who takes him as one of the twelve children destined to be a gift to the 456. |
|  | | |  | | | ALTERED VISTAS SAYS:
The final twist is perhaps a continuity-laden twist too far, but this story delights in some great plot twists prior to this, cramming a lot of story into its fifteen pages. The artwork is crisp with excellent likenesses. A very likeable strip.
|
|
 |  | | ESCAPE INTO ALCATRAZ |
 | | |  | | | ALTERED VISTAS SAYS:
I can see what the artwork is trying to do here, but it’s ugly, inconsistent and sometimes distracts from the actual story. There are a few frames where Matt Smith is impossible to recognise and even the alien blowfish (quite a distinctive look) changes from panel to panel. The actual story isn’t bad, though it’s never clear why the Doctor goes to all this effort to save Mako. Must have been a quiet week for alien invasions.
|
|  |  | | | SCRIPT: Tony Lee
ART: Mitch Gerads (art and colour)
LETTERING: Shawn Lee
EDITOR: Denton J. Tipton REPRINTS: None Alcatraz, 1962, and the Doctor is thrown into a cell with a disguised alien called Mako. Mako is hiding out because he owes money to the wrong Silurian, but the Doctor knows there is a bounty on his head and a riot the following week will see Mako as one of the victims. The Doctor travelled back to the time of Alcatraz’s construction and fitted a secret tunnel from the cell at the end of which is concealed a box containing special glasses that show the true form of everything in Alcatraz. Unfortunately when he puts them on, the Doctor realises that all of the guards are alien hitmen. Knowing it will take time to build his device to get them out, he goes to speak to Madman Malone, the king of Alcatraz, and convinces him to help. He finishes his device just as Mako is taken away. Activating it reveals the alien’s true form and Malone begins a riot. In the chaos, the Doctor and Makos flee to the sub-basement where they discover the real prison warden and officers. They make it out of Alcatraz by swimming to the shore. Next day’s newspaper states that Mako died in the riot, good enough for the hitmen to claim their reward without actually having to kill him. Mako thanks the Doctor and takes his leave. | | | 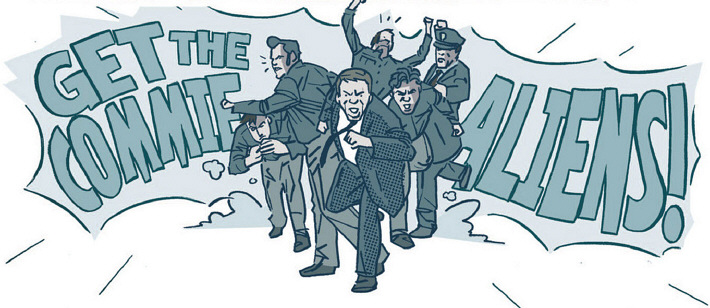 |
|
 |  | | EAGLE OF THE REICH |
|  |  | | SCRIPT: Andy Diggle
ART: Mark Buckingham (art), Charlie Kirchoff (colour)
LETTERING: Shawn Lee
EDITOR: Denton J. Tipton REPRINTS: None Landing at the Crystal Palace, London, in 1936, the Doctor is keen to discover what drew them off course. He meets with Dr Sophie Renard of the Societe Archeologique who is searching for the lost pneumatic railway. The Doctor leads her straight to it and there discovers the body of Thomas Webster Rammell clutching a glowing sphere. Dr Renard pulls a gun and the Doctor exposes her as Professor Kriemhilde Steiner of the Nazi Black Science Division. She has been searching for the sphere - the eagle of Ultima Thule - as the ultimate power source, the key to the thousand-year Reich. The Doctor urges her not to touch the sphere, which he says is an energy-draining phoenix egg, the thing which dragged them off course. A game of football ensues between ‘Brits’ and German, but just as Steiner gets the ‘ball’ it hatches, incinerating her and setting fire to the palace. The Doctor promises to show Rory and Amy the building in its heyday (which he does here). |
| |
 |  | | ALTERED VISTAS SAYS:
Eye-rollingly bad. Somehow made worse by the pneumatic railway material and its creator being loosely based on fact. Definitely made worse by a football match between Brits and Germans, especially as the Doctor has just said not to touch the sphere. The artwork’s not bad, though, even if it does have the Photoshop filter feel to it. This strip is riddled with clichés, but, of course, the Great Exhibition is hardly an original setting for a Doctor Who comic strip anyway, having featured in the Tenth Doctor DWA strip The Crystal Palace (also set in 1936 and featuring the fire) and Seventh Doctor strip Claws of the Klathi!
|
 |  | | HYPOTHETICAL GENTLEMAN |
 |  |  |  | |  | | | SCRIPT: Andy Diggle
ART: Mark Buckingham (art), Charlie Kirchoff (colour)
LETTERING: Shawn Lee
EDITOR: Denton J. Tipton ISSUES: 1 - 2
COVER DATE: September - October 2012
ON TV: Asylum of the Daleks - The Angels Take Manhattan
IN DOCTOR WHO ADVENTURES: Terror from the Swamp - The Greedy Gulper
IN DOCTOR WHO MAGAZINE Sticks and Stones - The Cornucopia Caper
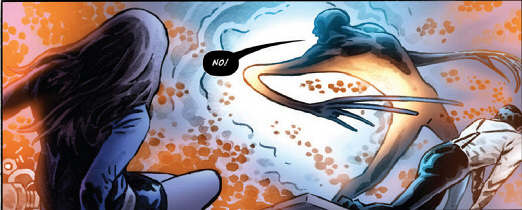
REPRINTS: Reprinted in Hypothetical Gentleman, Series 3 Volume 1, March 2013 (cover as for Issue 1 Cover A). London 1851, and a seance ends in Emily, the medium, being exposed as a fake. The TARDIS lands in the city and the Doctor, Amy and Rory set off for the Great Exhibition. Emily and her husband Charles have previously experiences an alien visitation and tonight they experience another one as Emily is possessed but she fails to draw the machine that will mean their salvation. Using the psychic paper, the Doctor and the Ponds enter the Great Exhibition, despite it being the middle of the night and a day before it officially opens. They are just in time to hear a scream and discover a policeman frozen in time. He is right in front of a Quantum Resonator, an alien object that opens windows into hypothetical worlds - a glimpse of what might have been. The exhibition records state that the Resonator was built by Emily and Charles and they are brought to the Crystal Palace. Emily reveals herself to be a telepath. During her first visitation, she drew detailed plans which allowed Charles to build the Resonator. Looking at the blueprints the Doctor sees an artron capacitor. Using the sonic screwdriver, he is able to pick up a trace of artron energy in the vicinity. Emily has a seizure and Rory stays behind to tend to her while the Doctor and Amy race off to locate the source of the artron emission - which leads them directly to the TARDIS. Rory, meanwhile, is attacked by a figure that steps from the Quantum Resonator. Emily confronts the figure and asks it to reveal what is inside it, but what it shows is the Doctor’s past. The Doctor and Amy, meanwhile, realise that the TARDIS is not where they left it and, powered by the TARDIS, the Resonator could punch a hole between realities. The figure attacks Charles before melting away. The TARDIS arrives and the Doctor promises to make everything right. The figure has been trying to make himself real by stealing time from his victims. Someone hijacked the TARDIS’ circuits to send the blueprints to Emily, knowing that the Doctor would return to 1851. Somebody is toying with the Doctor. He builds a synchronisation cage, a device for trapping the figure, but the figure appears before he has a chance to activate it. The blueprints were written in High Gallifreyan and as the Doctor demands answers, the figure grabs him and begins to absorb abundant time energy, enough to make him real. But Amy attacks the Resonator with a chair, causing it to explode and dragging the figure back into hypothetical space. As he vanishes, Rory, the policeman and Charles all unfreeze, but the Doctor is left with unanswered questions about the figure’s identity. However, as the TARDIS departs, we see the face of the figure reflected in the central column. | | | ALTERED VISTAS SAYS:
IDW’s numbering is hardly the simplest thing in the world, and did we really need six covers for the first issue, especially as all bar one of them have nothing to do with the content? The script by Andy Diggle is extremely good, beautifully setting up a story arc with lots of tantalising clues but giving us enough substance and structure right here and now to make this a satisfying story in its own right. Charles and Emily are well characterised and the period is nicely evoked in the words. However, whilst the artwork is sometimes extremely good, it is all too often muddily coloured and has a tendency to look like someone just took some photos from Doctor Who and put them through a Photoshop art filter. Were the artwork as evocative as the story, this would be a classic Doctor Who comic strip.
| |
| |
 |  | | THE DOCTOR AND THE NURSE |
|  | | | SCRIPT: Brandon Seifert
ART: Philip Bond/Ilias Kyriazis (art), Charlie Kirchoff (colour)
LETTERING: Shawn Lee/Tom B. Long
EDITOR: Denton J. Tipton ISSUES: 3 - 4
COVER DATE: November - December 2012
ON TV: The Snowmen
IN DOCTOR WHO ADVENTURES: Meteorite Meeting - Snowball!
IN DOCTOR WHO MAGAZINE Sticks and Stones - The Cornucopia Caper
REPRINTS: Reprinted in Hypothetical Gentleman, Series 3 Volume 1, March 2013 (cover as for Hypothetical Gentleman Issue 1 Cover A shown above). The TARDIS lands aboard Dunlop Station, orbiting 70 Virginis B, but immediately dematerialises to reappear in London, England 1588. Several other locations follow, but the Doctor and Rory are lost and Amy is going to kill them. A few hours previously, they were involved in a life or death situation with the Siblinghood of Saint Augustine, Physicist on Hipponensis 3 in 7213AD. They made it back to the ship. but Rory and the Doctor were soon arguing about the Doctor’s irresponsible attitude to danger. Amy decided they needed time together to bond, so when the TARDIS landed in London 1814 she deposited them in a pub (which for some reason seemed significant to the Doctor, though he couldn’t remember why) and went sightseeing. Only trouble is, the Doctor and Rory decided to cheat. hop aboard the TARDIS and come back at the end of the night to pick Amy up but now cannot get back to the right time and place. Amy, meanwhile, bored in 1814, sees an anachronistically dressed man wearing an eye drive who she decides to follow. Attempting to escape a tar pit in California 35,000 years ago, the Doctor suddenly realises the significance of 1814 - the year of the London Beer Flood - something Amy sees first hand as a brewery, sabotaged by the man with the eye drive, explodes. Surviving the beer tsunami, Amy locates the man with the eye drive. The Doctor meanwhile recharges the TARDIS in Cardiff as all the short hops have drained its energy reserves. Unfortunately he becomes embroiled in an attack by Cybermen and he and Rory end up trapped in space with only seven minutes left to live. Working with Rory, he begins to formulate a plan for escape. Amy holds the Silence agent at gunpoint. He tells her the Beer Flood was a fixed point always destined to happen before vanishing. Amy reads that fifteen people died during the disaster and, realising that the event is fixed but the deathtoll is not, sets about changing the figure. The Doctor and Rory set up camp on the moon while the TARDIS recovers, but another attempt to get them back to Amy puts them down on the right day in the wrong country. Rory persuades the Doctor to play it safe and just fly the TARDIS to London. Amy is livid | | | 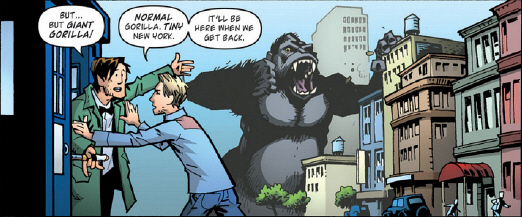 |
|
 |  | | PRISONERS OF TIME |
 |  |  | |  |  |  |  |  | | SCRIPT: Scott & David Tipton
ART: Issue 1 [Simon Fraser (art), Simon Caldwell(colour)] Issue 2 [Lee Sullivan (art), Phil Elliot (colour)] Issue 3 [Mike Collins (art), Charlie Kirchoff (colour)] Issue 4 [Gary Erskine with thanks to Mike Collins (art), Charlie Kirchoff (colour)] Issue 5 [Philip Bond (art), Charlie Kirchoff (colour)] Issue 6 [John Ridgway (art), Charlie Kirchoff (colour)] Issue 7 [Kev Hopgood (art), Charlie Kirchoff (colour)] Issue 8 [Roger Langridge (Art), Charlie Kirchoff (colour)] Issue 9 [David Messina (art), Georgia Sposito (ink), ScarletGothica (colour)] Issue 10 [Elena Casagrande (art) Arianna Florean (colour)] Issue 11 [Matthew Dow Smith (art), Charlie Kirchoff (colour)] Issue 12 [Kelly Yates (art), Charlie Kirchoff (colour)]
LETTERING: Tom B. Long
EDITOR: Denton J. Tipton ISSUES: 1 - 12
COVER DATE: January - December 2013
ON TV: The Bells of Saint John - The Time of the Doctor
IN DOCTOR WHO ADVENTURES: Museum Piece - By the Book
IN DOCTOR WHO MAGAZINE Hunters of the Burning Stone - Welcome to Tickle Town
REPRINTS: A cloaked figure studies images of the Doctor and reflects on the Time Lord’s legacy. He notes that the Doctor has always had friends, and decides to change that... The TARDIS arrives at the Royal College of Surgeons in London, England, 1868. The First Doctor, Ian, Barbara and Vicki have arrived to meet Thomas Huxley, a friend of the Doctor's, and are soon embroiled in a hunt for missing students in the London Underground. Here they find a trail of footprints leading to a mysterious web-covered passage. Soon they are surrounded by Zarbi and led away, but Ian, the Doctor and Huxley escape. After searching, the Doctor finds the Animus, who says a seed of it remained despite its destruction. As an act of vengeance against the Doctor, the Animus plans to take over Earth with an army of Zarbi drones, but before he can enact his plan he is hit by a train driven by Ian. The Doctor uses a portal to send the Zarbi home. The Doctor notes that the Animus could not have reformed on its own, and that the portal used to bring it here was beyond its technological abilities. The Doctor suggests further investigation to his companions, but is shocked to find them missing. The Second Doctor, Jamie and Zoe land the TARDIS in a shop filled with hundreds of police boxes. They learn from a salesman that they are in a police box section of the universal trading post, the Frenko Bazaar, a famous intergalactic trading post, where one can buy just about anything. The Doctor sees members of the Voraxx Consortium, aliens involved in the slave trade. The Doctor, Jamie and Zoe follow them into Stellar Imports & Exports. A member tells the Doctor that Jamie, coming from the past, is worth a mint. When the Doctor says Jamie isn't for sale, the Voraxx members follow them, kidnap Jamie, and take him aboard a slaver ship in orbit. Having planted a bug on Jamie, the Doctor is able to trace his location. They transmat to the ship and rescue him then release two Ice Warriors, who start an uprising and take over the ship. As the trio teleport back to the bazaar, the Doctor is shocked to find his companions missing. | | | | 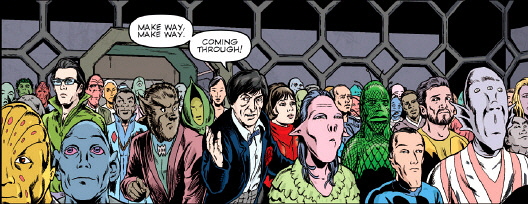 | | | | Liz Shaw recalls the Third Doctor and Sarah back to Earth, explaining that the Brigadier has been acting strange; he is sending UNIT agents all around the world to random positions and acting surprisingly violent. The Doctor realises he has been taken over by a Remoraxian. He builds a ray to free the Brigadier from the creature's control and the Brigadier explains that he was infected at a UNIT Nautical Research Facility on the coast which the Remoraxians have taken over. The Doctor travels to the UNIT sea base. The Ramoraxian Prime wants to flood the world to make it suitable for his species. Richard Nixon sends bombers to destroy England and the Ramoraxians. The Brigadier and the Doctor convince the Ramoraxians that the people of Earth are crazy, and they head off in their ship, meaning the bombers are called off. The hooded figure appears and uses a vortex manipulator to abduct Sarah, Liz, and the Brigadier. The Doctor takes Leela to Agratis, but it is under Judoon law. K9 reports that they were called in because the Jewel of Fawton was stolen. The Doctor visits his friend Mason Vox and his daughter Cilia. They all travel to the museum to meet Curator Frez. Cilia reveals that her boyfriend Roget stole the jewel. The Judoon will rip apart the planet, but the Doctor hopes to find Roget and the jewel, and restore it to its proper place. He sends Leela and K9 to distract the Judoon while the others go after the jewel. Travelling to caves, Vox and Frez explain that the world was harsh until they found the jewel, and terraformed the planet. They eventually find Roget; placing the jewel back where it was originally found. Crystalline insect-like creatures awaken. Roget explains that they went into hibernation when their crystal was removed, but now it has been returned to its rightful owners the Juddon will withdraw. However, before the Doctor can enjoy victory, the hooded figure abducts K9 and Leela. Somewhere in a place between places, the hooded figure tries out a new weapon. Meanwhile, the Fifth Doctor, Tegan, Nyssa and Adric are taken prisoner by the Rutans. The TARDIS has landed in a Rutan weapon test field, and the Rutans think they are Sontaran spies. They make an escape attempt, but only fall into the hands of a Sontaran scout fleet. The Sontarans take the crew to their leader, Commander Strock. Seeing the Sontaran attack as suicidal, the Doctor offers to take some of the fleet in the TARDIS to the nearest way station where they can rearm and gain the element of surprise. Strock leads a squad to help the Doctor, Tegan, Nyssa and Adric back to the TARDIS as as the other Sontarans head into battle. They make it to the TARDIS safely, but Strock cannot resist the battle and charges off to fight. Nyssa, Adric and Tegan are abducted by the hooded figure. The Doctor remembers that this has happened before. The Sixth Doctor, Peri and Frobisher land in the year 7214. The Doctor is captured by robotic officials controlled by the Master, and all the staff in the prison are his Auton slaves. Frobisher and Peri break in, but are discovered and pursued by Auton. The Doctor breaks out of his cell and runs into Peri. He stops the Autons by melting their plastic, but the Master escapes. When the Doctor turns round, though, he sees Peri captured by the cloaked figure. However, Peri was actually Frobisher in disguise. When the Doctor and Peri left the console room at the start of the adventure, the Tenth Doctor appeared to Frobisher through the TARDIS console. The Doctor told him he needed his help, and that he would also be helping many other companions. Frobisher impersonated Peri as per the Tenth Doctor's instructions. Now in the same cell system that the cloaked figure holds the Doctor's other companions, Frobisher escapes and begins exploring. | | | | 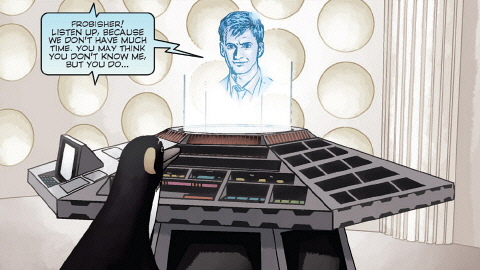 | | | | Scotland, 1830. Maid Mackenzie serves two elderly patients in bed. The Seventh Doctor accompanied by Ace examine the patients. Meeting the master of the house, Alan Campbell, the Doctor learns that the patients are his Great Aunt and Uncle and that they fell ill about three months ago. The Doctor and Ace leave. The Doctor believes Campbell isn't who he says he is and thinks that the 'aunt' and 'uncle' are not human. They head to the TARDIS to examine a spoon the Doctor stole from the bedroom to find out exactly who they are. He sends Ace for a walk around the castle with a device which locates a computer room. The Doctor and Ace realise that the door was left unlocked - they were meant to find it, and only the Master could come up with something like this. However, they are attacked by a creature and Ace is forced to kill it with a can of Nitro-9. The Doctor examines the body, determining that it's a Gulwort, which drains the life force of its victims. Mackenzie runs to tell the Doctor that the patients have stirred, but haven't awoken, but an attempt to see them is blocked by Campbell who then shifts into the Master. The Master reveals that he's been working with a new partner. He's been siphoning life force from the Campbells to transmit power to his partner, helping him conduct a revenge scheme against the Doctor. The Doctor reveals that the Gulwort is dead, but before the Master can retaliate, he pulls out the spoon-device that has been keeping the Campbells asleep, and deactivates it. The Campbells revert to their true form, Aeroliths. They recognise the Master as the one who trapped them and chase after him. As The Doctor and Ace bid farewell to an astonished Miss Mackenzie, the cloaked figure arrives and snatches Ace... San Francisco, February 2000. and the Eighth Doctor returns to see Dr Grace Holloway and persuades her to travel with him in the TARDIS. They eventually land on an Earth-like planet and are greeted by a boy named Oren who tells them about the city of Brendais, where the Overseers live. After a meal at Oren's house, Oren's parents tell the Doctor that the Overseers protect and provide for their village in return for a few villagers, but then Oren is chosen and the Doctor and Grace set off to rescue him. Making their escape, the Doctor reveals that he knows the villagers are just unwilling organ donors propping up the Overseers regime and getting nothing in return. Back at the TARDIS, the Doctor anticipates the arrival of the hooded figure and tries reasoning with him. Attacking the Doctor, the figure abducts Grace. The TARDIS lands by a monument to Drake Ayelbourne of Altair VII, the wealthiest man in the outer rim of the galaxy. The Ninth Doctor explains to Rose that Drake spent nearly a third of his fortune on building the monument, all so he would be remembered. From within the tomb they are observed on a screen as Rose falls down a hole. As the Doctor runs after her, the cloaked figure watches him. Inside the monument, Rose is introduced to a handsome young man who tells her he is Drake Ayelbourne. She is suspicious, the Doctor equally so when he makes it inside. Shattering one of Drake’s machines as Drake tries to claim Rose, they see him age dramatically. Claiming that if he can’t have Rose no-one will, Drake presses the self-destruct, but the Doctor and Rose escape - and straight into the clutches of the hooded figure. They both recognise him as Adam (The Long Game), consumed with ideas of revenge because they left him with a computer port in his head. He summoned a time agent and stole a vortex manipulator. Now he abducts Rose. The Tenth Doctor and Martha land at the Griffith Observatory in Los Angeles, California in the mid-1950s and gain entry using the psychic paper, but are soon disturbed by a film shoot on the lawn. Stunt manager Deke Williams says that the movie is behind schedule and crew members are disappearing. The producer notices Martha, and decides she will be the new star in the absence of actress Bianca. The Doctor persuades her to play along so he can get to the bottom of the mystery, but unfortunately at the bottom of the mystery is a Quark which zaps Martha to a Dominator base. The Dominators plan to mine the Earth using slave labour. The Doctor gets inside, destroys the Quarks and warns the Dominators to leave which they do. Martha is abducted by Adam and the Doctor realises the severity of the situation and sends a psychic message to Frobisher. The Eleventh Doctor and Clara have just ended a civil war. However, a blast of energy knocks them both unconscious. The Doctor comes round just in time to see Adam teleport away, Clara in his arms. He heads to the TARDIS and visits all the places where Adam kidnapped his companions, where he attempts to gain information from the people there, including the Judoon. Nothing proves useful, and he realises that rather than delving into his own past, he needs to look at Adam's. Feeling guilty about what his actions drove Adam to do, he goes to Van Statten's vault in Utah, hoping to find a trace he can use to track him down. He discovers Adam has taken every bit of alien technology and left the Time Agent frozen in time. He releases Agent Neal Shaw who gives the Doctor a tracker to locate his vortex manipulator. The tracker leads him to a giant fortress in the Time Vortex. Adam greets him with a gun. The Master enters, having survived the Aerolith attack. The Doctor warns Adam of the Master’s evil, but the Master laughs and instructs Adam to continue with the plan. Adam leads the Doctor and the Master into a chamber where every one of the Doctor's companions sit in tubes. Adam holds a remote which will kill every companion when he presses the button. He says all of the Doctor’s companions dying might destroy the universe as the Doctor's history is rewritten, but as they are in limbo they will not be affected. He tells the Doctor to choose one companion to save, and the rest will die. | | | | 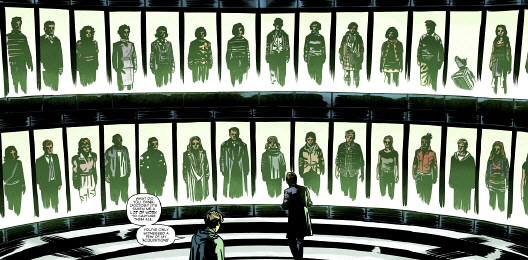 | | | | The Eleventh Doctor summons his other ten selves. Adam decides to kill all the companions, but it is revealed his remote control is actually Frobisher in disguise. The Eleventh Doctor says he left a chronal trail which enabled the TARDISes to merge and bring the Doctors here. Adam and the Master release an Auton army. However Frobisher, disguised as an Auton, overpowers Adam and releases the companions who overpower the Autons. However, the Master has one last trick - he sends a chronal wave harvested from the Aeroliths through the Doctors’ combined TARDISes to wipe out all of time and space, but this is a step too far for Adam. He turns on the Master, but the Master stabs him. Adam uses the vortex manipulator to destroy the controls. The Master’s plans ended, Adam dies, having finally realised what it means to be the Doctor’s companion. | | | | 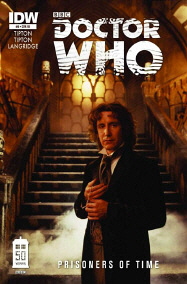 | | 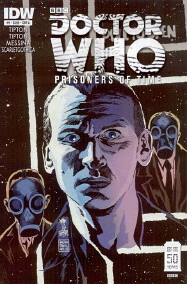 | | | 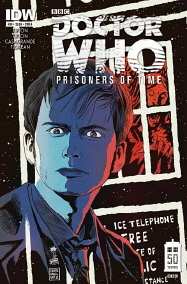 | | 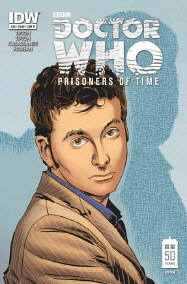 | | |  | |  | | | 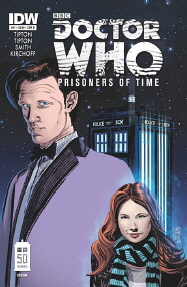 | | 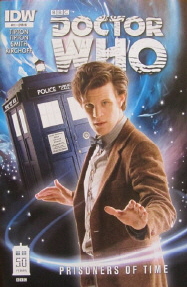 | | | 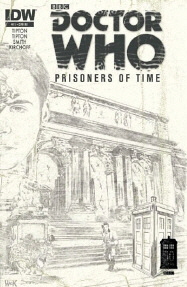 | | 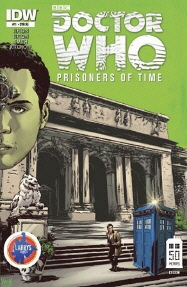 | | | 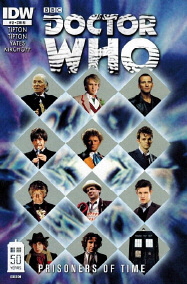 | | 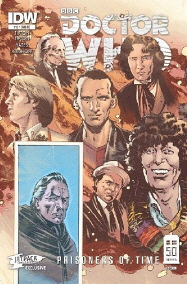 | | | 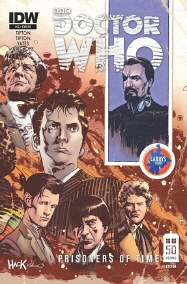 | | 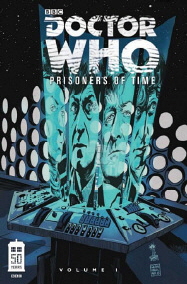 |
| |
|  |  | | ALTERED VISTAS SAYS:
IDW finally manages to produce a comic strip that, across all its various issues and formats, has a whopping and frankly ridiculous fifty-five covers. An actual issue has thirty-two pages... The artwork across this epic is variable. Part 1 is probably the most disappointing, let down further by flat, unsympathetic colour. Part 5 has weird cutesy renditions of the Fifth Doctor and his crew which hugely undermine the story. Part 8 - sigh - I love Langridge’s art, but it isn’t suited to this strip and robs it of any atmosphere or sense of jeopardy. Stand-out art comes with Issue 2 (let down by the colour), Issue 3, Issue 6 and 9-12. What lets it all down is the story. In most parts, the individual adventures feel slight or simply like stalling until we reach the abduction (and then there are slips in characterisation. For example, Leela is served particularly poorly, as is the Fourth Doctor, and the first Doctor is able to pilot the TARDIS perfectly, which hugely undermines the entire point of the first two seasons of the show.) And did anyone really want to know what happened to Adam Mitchell from The Long Game? This just feels like IDW playing to all their weaknesses, I’m afraid.
|
|
 | | |  |
 |  | | THE BIRTHDAY BOY |
|  |  | | SCRIPT: Matthew Dow Smith
ART: Horacio Domingues (pencils), Rudolfo Buscaglia (layouts), Ruben Gonzalez (inks), Phil Elliot (colour)
LETTERING: Tim B. Long
EDITOR: Denton J. Tipton Clare wakes a groggy Doctor with breakfast in bed, telling him that it’s his birthday, but things aren’t right. He and Clara live in an ordinary house, he has an office, and Clara is preparing well-cooked food for his birthday party. In the Doctor’s office, however, is something resembling the TARDIS, which the Doctor vaguely remembers. Out shopping for items, he meets people who are strangely familiar to him - Sarah Jane Smith and the Brigadier, Tegan, Nyssa and Adric, Steven and Dodo, and starts to realise that things are not right. The shops themselves are stocked with curious items such as Adipose and Cybermen, and then the Doctor encounters a band of old adversaries who all ask him for help. Back ‘home’, when he arrives, the Doctor’s friends celebrate his birthday. They present him with presents - his fob watch, the TARDIS key, psychic paper and the sonic screwdriver. These items allow him to break free of the mental projection caused by a Trylonian Brain Drain machine. The Trylonians want to drain the Doctor’s mind of knowledge of the alien species he’s encountered to advance their plans of conquest. Recalling all his previous incarnations, the Doctor overloads the Trylonian battle computer. Surrounded, the Doctor and Clara prepare to fight the monsters, protect their friends and save the planet - just what they always do, in fact. |
|
 | | |  |
 |  | | ALTERED VISTAS SAYS:
There are some neat visual touches in this strip (such as Greel’s time cabinet and troll dolls in the shops and a sign for the Fitzroy Tavern on a street), and even the pair of policemen on the street recall Resurrection of the Daleks. However, many of the likenesses are simply awful (such that I did wonder when he met people calling themselves Sarah and the Brigadier if they were obviously intended to be imposters) and the Fourth Doctor looks like Steven Moffat in an even curlier wig. Actually, the story’s great strength is its open-endedness, affirming Doctor Who as a strongly moral but essentially ongoing and endless narrative. It’s pleasing, but certainly not one of the best.
|
 |  | | THE EYE OF ASHAYA |
 | | | 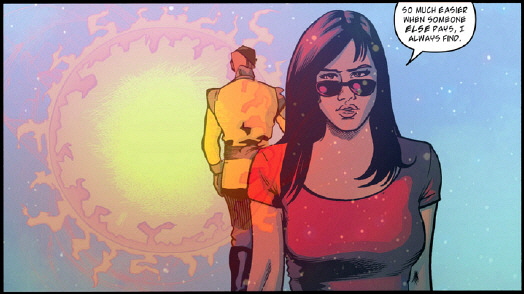 | | | SCRIPT: Andy Diggle
ART: Josh Adams (pencils), Marc Deering (with Josh Adams on #6) (inks), Charlie Kirchoff (colour)
LETTERING: Shawn Lee
EDITOR: Denton J. Tipton ISSUES: 5 - 6
COVER DATE: January - February 2013
IN DOCTOR WHO ADVENTURES: Museum Piece - Terror in the Taj Mahal
IN DOCTOR WHO MAGAZINE Hunters of the Burning Stone
REPRINTS: Reprinted in The Eye of Ashaya, Series 3 Volume 2, July 2013. A bad holiday in Majorca ends in Amy and Rory seeing Lady Christina de Souza at the airport swanning off to Utah before the Doctor arrives to offer the couple tickets to the most luxurious star-liner in the galaxy. Amy accepts and they head off to the Excelsis, travelling through the Ashaya Nebula. Captain Vorch is introduced to Ambassador Trelayce of the Karkaptan Inheritance by his Ashayan first mate. Lady Christina de Souza strides in, having somehow left Earth and boarded the star-liner before the TARDIS. She introduces herself to the flirtatious captain much to the disgust of her alien companion, a catlike creature called Neko. Meanwhile, something goes wrong with the TARDIS. The Doctor tells Amy and Rory to go ahead while he tries to fix it. Captain Vorch explains to Lady Christina that the ship's shields are powered by the Eye of Ashaya, the largest diamond in the galaxy. Amy and Rory recognise her from the airport. With Christina out of sight, the Doctor gives them a brief biography: thief, billionaire, socialite, and bus driver last seen on the run from U.N.I.T. Amy said she intended to go to Utah and the Doctor realises she intended to raid van Statten’s vault. Meanwhile, Neko silently observes three Ashayans conspiring. Two bald Ashayans urge the first mate to help them but the first mate describes as mutiny and terrorism. Neko warns Lady Christina that the Ashayan crew is plotting something. Captain Vorch walks in. She shoots him in the face with a neural pacifier and informs him that they are going to set the controls of the ship for the heart of the sun. Neko complains that the now-pacified captain is going to ruin their scheme with his obvious drooling. Christina dismisses his concerns, takes captain's headset and touches a spot near her ear, which transforms her into Vorch. She is observed by Amy and Rory watch. Disguised as Vorch, Christina overrides the ship's controls. Amy is convinced Christina intends to steal the Eye of Ashaya. The Doctor surprises Christina by waiting in her room. He cancels the holographic projection of Vorch and convinces her of his true identity. He also knows she got off-world by stealing a ship from the Utah vault and is up to her old tricks. Amy tells an Ashayan that someone is trying to steal the Eye. The Ashayan, who was plotting to steal the diamond himself, forces the Ponds into a service elevator at gunpoint. He explains how the Vodirans plucked out the "eye of Goddess," causing their sun to sicken and condemning their race to death or enslavement. However, the Doctor has already stolen the Eye and now disarms the Ashayan with his sonic screwdriver. He intends to fix the TARDIS using the diamond to sift the data of the Matrix, which has somehow survived the destruction of Gallifrey, but his plans to use the diamond are derailed when an alarm alerts everyone that they're hurtling into the sun. Without the diamond even the shields won’t work. Christina confronts the Doctor and he realises she is there not to steal the diamond, but to return it to the star and save the Ashayan race. They work together, reigniting the sun. The Ashayans celebrate and drive the Vodirans off their planet. |
| |
 |  | | SPACE ODDITY |
 |  |  |  |  |  |  |  | | | 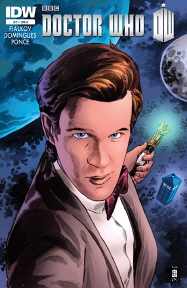 | | | | SCRIPT: Joshua Hale Fialkov
ART: Horacio Domingues with Andres Ponce (pencils), Ruben Gonzalez (inks), Adrian Salmon (colour)
LETTERING: Shawn Lee
EDITOR: Denton J. Tipton ISSUES: 7 - 8
COVER DATE: March - April 2013
IN DOCTOR WHO ADVENTURES: Eye Spy - The Egg Hunt
IN DOCTOR WHO MAGAZINE Hunters of the Burning Stone
REPRINTS: Reprinted in The Eye of Ashaya, Series 3 Volume 2, July 2013. | | | | | 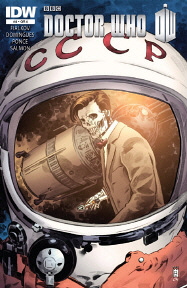 | | | | | 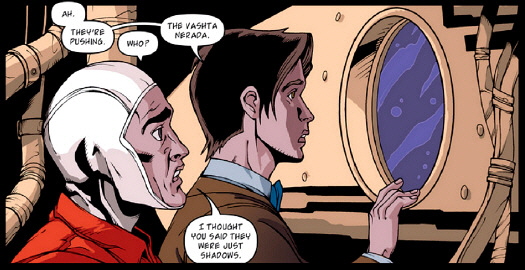 | | | | | | | 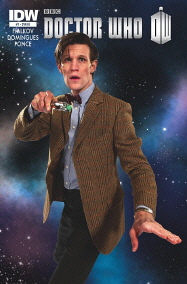 | | | | | |  | | | | | 1965. On a spacewalk outside Russian space capsule Vlostok 11, cosmonaut Dmitri Selonovich is reduced in seconds to a skeleton. Surviving cosmonaut Alexey Leonov tries to contact Earth, but instead contacts the Doctor who materialises close by. After examining the dead cosmonaut, the Doctor instructs Leonov to turn on every light having identified the presence of the Vashta Nerada. He tries to take him to the TARDIS, but the door slams on them forcing them to retreat to the Russian capsule where the Doctor attempts to repair the systems. The TARDIS is providing life support but the Vashta Nerada is pushing it out of range. However, the Doctor says everything will be fine while they have lights. The lights go out. With systems failed and the capsule starting to buckle in the vacuum, the Doctor manages to repair the lights. He rocks the capsule from side to side hoping to propel it closer to the TARDIS, but when this fails Leonov reveals that the capsule carries bombs. The Doctor detonates them, propelling the ship towards the TARDIS and allowing them entry. However, once inside, the Doctor realises that the Vashta Nerada have already gained entry. The Doctor realises that they want to reach Earth and, under cover of the Arctic night, make it to the Boreal Forest from where they will have a chance to destroy the planet. The Doctor turns the atmosphere off and draws the Vashta Nerada into the ship before containing it. He’ll take it somewhere safe. He then returns Leonov to Moscow and lectures him on morality. While Leonov negotiates with his superiors, the Doctor releases the Vashta Nerada on a jungle world. | | | | | 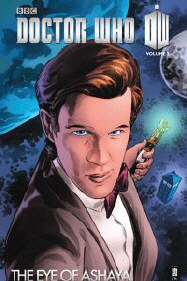 | | | | | | | | | | 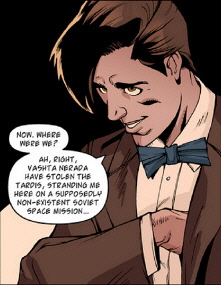 | | | ALTERED VISTAS SAYS:
A confined space with limited and diminishing resources and a threat that could eat you alive in a second.... Brilliant idea! What could go wrong? Er... just about everything apparently. I know I’m always banging on about likenesses and how accurate they are, but really, if you’re illustrating something based on a franchise with recognisable characters, then being able to draw likenesses would presumably be something of an asset. Actually, being able to draw acceptable basic human physiognomy would also be extremely helpful. There’s a portrait of the Doctor in this, shown right, that is worthy of comparison with John Canning’s most bizarre ever rendition of Tom Baker (which is really saying something). I perhaps wouldn’t mind quite so much if the story was solid gold, but it’s not really anything at all, just an excuse to reuse the Vashta Nerada which, truth be told, doesn’t particularly work in the comic strip medium anyway. Added to that, the story is very thin, the characterisation slight (though Leonov does come across ultimately as a dignified man) and the moralising is eye-rolling, and I say that as not a huge supporter of Russia by any stretch.
| | | |
 |  | | SKY JACKS! |
 |  |  |  |  |  | | SCRIPT: Andy Diggle and Eddie Robson
ART: Andy Kuhn (art), Ruben Gonzalez (inks), Charlie Kirchoff (colour)
LETTERING: Shawn Lee
EDITOR: Denton J. Tipton ISSUES: 9 - 12
COVER DATE: May - August 2013
IN DOCTOR WHO ADVENTURES: Sandblasted - Reprogramme
IN DOCTOR WHO MAGAZINE Hunters of the Burning Stone - A Wing and a Prayer
REPRINTS: Reprinted in Sky Jacks!, Series 3 Volume 3, November 2013. A US fighter plane called Sky Jack over Iwo Jima, Japan, is in the process of crashing when it is swallowed by a strange white hole in the sky. Clara, meanwhile, is lost in the TARDIS, until she finds a button. She presses it and is immediately falling through a sky where she is seized by a large ferocious robotic raptor which is then harpooned by the crew of the Sky Jack. Whilst fighting off another raptor, they save her from falling. They introduce themselves as Garfield, Lasseter and Captain Filmore, stranded now for three years in a world with no night and no ground, They head for Tipperary Station, a floating island made of alien spaceships, and there take Clara to meet the Smith - actually the Doctor. | | |  | | | | Over tea, the Doctor explains that the TARDIS had been suffering from muddled systems which landed them in a white void. Something lured the Doctor outside and then he found himself in this strange world. He has spent the last three years (from his perspective) helping other stranded travellers and building a TARDIS locator, but the readings are erratic. As Clara explains what happened to her, the Doctor realises there must be something containing the air here - a wall. To get the Sky Jack to the wall, the Doctor determines to build a better engine, and in so doing he discovers an atomic bomb on board intended to be dropped on Kyoto alongside the ones to be dropped on Nagasaki and Hiroshima. The Doctor dismantles the bomb and starts turning it into a nuclear reactor, but he needs a neutron capacitor and the only one belongs to the Cataak Cartel, local black marketeers. The Doctor pays them a visit. They eject him from the bottom of Tipperary Station where he is saved by Clara riding the robotic raptor. However, this is just a distraction allowing Garfield and Lasseter to steal the capacitor from the Cartel, but they return to the Sky Jack pursued by Cataak’s warriors. The plane takes off in the nick of time and travels out further than anyone has ever gone. Finally they find the wall - the wall of the TARDIS which they are still inside. The Doctor switches off the engines before revealing that he built in anti-gravity lifters when he replaced the engine. As he and Clara climb onto the top of the plane, the Doctor speculates that the TARDIS must have diverted all energy from the Eye of Harmony into powering this one chamber, inflating it to macro-scale, but someone has opened the Eye of Harmony to use as a bridge to draw things in from the world outside. Using his sonic screwdriver, he determines that they are in the original console room and need to pilot the Sky Jack to the centre of the sky where they will find the console. Whilst analysing the TARDIS logs, the Doctor realises whoever is behind this is able to mess with the telepathic circuits and use a stellar manipulator. They are attacked by several robotic raptors, one of which manages to rip out the nuclear reactor. Faced with no alternative, the Doctor orders Captain Filmore to glide into whatever lies below. Spying a floating island ahead, they realise they are coming in too steep. They manage to land, but the plane is a wreck. Approaching a tower, the Doctor reveals that the one behind all this is the Hypothetical Gentleman (see here) who has been hiding all along inside the TARDIS. The Hypothetical Gentleman reveals himself, and proclaims himself to be the Matrix. The Matrix explains that became a sentient being the moment the Time War ended as all information about all Time Lords was uploaded to the Matrix. To escape, it uploaded a copy of itself to the last surviving TARDIS, but the Doctor realises it now wants to become real. The TARDIS fought back, creating this world to drain its power so the Matrix would have none to power its escape. It has been scavenging for parts for a body, but the Doctor has now provided it with a source of power in the form of the nuclear reactor. Too late the Doctor realises he has been talking with a decoy while the real Matrix makes its escape. However, Clara has smuggled herself aboard its ship and attacks the Matrix, then attempts to detonate the nuclear reactor, but the Matrix contains the explosion with its mind. The Doctor communicates with her via the TARDIS’ telepathic circuits, fighting the Matrix for control. He persuades Clara to jump from the ship before he reconfigures the wormhole into a loop. She arrives back on the normal TARDIS. He takes the US airmen to September 2nd 1945, Victory in the Pacific Day. | | | | ALTERED VISTAS SAYS:
I like the idea of the TARDIS having a Lego room. The artwork takes a little getting used to and doesn’t feel entirely consistent in style throughout, but at least it doesn’t distract from the telling of the story. The big reveal at the end of the second part is easy to guess as soon as the Doctor explains about erratic readings on his TARDIS detector, but the storytelling is largely satisfying until we get to the stuff about the Hypothetical Gentleman actually being the Matrix. From here I find the story somewhat less interesting, with the whole link to the Time War trying my patience. Still, it remains a solid and reasonably entertaining story.
| |
| |
 |  | | DEAD MAN’S HAND |
|  |  |  | | 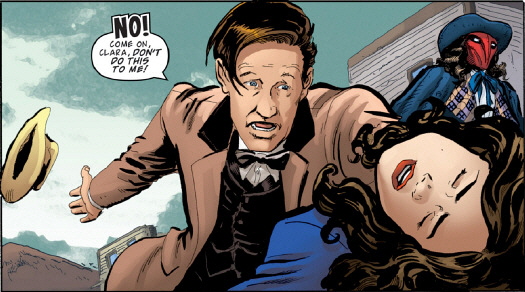 | | | SCRIPT: Tony Lee
ART: Mike Collins (art), Charlie Kirchoff (colour)
LETTERING: Shawn Lee
EDITOR: Denton J. Tipton ISSUES: 13 - 16
COVER DATE: September - December 2013
ON TV: The Day of the Doctor, The Time of the Doctor
IN DOCTOR WHO ADVENTURES: Shipwrecked - By the Book
IN DOCTOR WHO MAGAZINE A Wing and a Prayer - Welcome to Tickle Town
REPRINTS: Reprinted in Dead Man’s Hand, Series 3 Volume 4, December 2013 (cover as for Issue 13 Cover RI). Deadwood, Dakota Territory, March 1882, The town is thrown into panic as the masked gunman approaches. The sheriff confronts him and shoots him, but the gunman doesn’t fall and instead kills the sheriff with a finger. On his way to Deadwood is Oscar Wilde, and also Calamity Jane who reveals that Wild Bill Hickok’s grave is empty. The Doctor and |
|
 |  | | Clara arrive by TARDIS to find the whole town deserted. The sonic screwdriver picks up huge electromagnetic readings and the pair learn about the gunman from a local. The townsfolk who haven’t fled are holding a meeting in the Nugget Saloon, and the Doctor and Clara attend and, while the Doctor offers himself for the position of Marshall, Clara befriends Oscar Wilde. Pairing up with Calamity Jane, the Doctor sets out to track the gunman, but he finds them and, when the Doctor attempts to analyse it with his screwdriver, it electrocutes him. However, the Doctor is even more shocked to learn that Thomas Edison is working on a secret project in the Black Hills. The gunman turns on Calamity and, when Clara tries to save her, both are mown down. The Doctor reveals that Clara isn’t dead yet because the charge was split between her and Calamity. Both are resuscitated. The Doctor says the gunman didn’t do it, but that it isn’t a natural phenomenon either. He deactivates the gunman then reveals a metal conductor plate beneath the main street. With a camera from the gunman’s mask, the Doctor plans to follow the cables connected to the plate. Aliens watch from the camera. They have Edison prisoner. The Doctor removes the gunman’s mask to find the corpse of Wild Bill Hickok. Hearing of a shady and elusive man watching them, he breaks into Paul Reynard’s flop house to find CCTV and monitors and the controls for the gunman and the metal plate. These carry the nameplate of Edison. The gunman vanishes despite the Doctor proclaiming this impossible. He and Oscar Wilde set out on horseback and soon discover a vast alien spaceship in the Black Mountains. Meanwhile, in Deadwood the Seventh Cavalry arrives led by Captain Lacey. He visited the cemetery on the way in and discovered every grave empty. Clara runs into Paul Reynard who holds her at gunpoint. The Doctor and Oscar run into similar problems aboard the alien ship surrounded by animated corpses and are taken to meet Sondrah of the T’keyn, who comes to Earth every thousand years to judge it. So far it has survived - but not this time. This time is finds Earth guilty of war, slavery and genocide. He sentences it to destruction, starting with the Doctor and Wilde. The Doctor saves his life by invoking the Shadow Proclamation and being granted permission to present his case in the Nexus Holoworld Court, but he suspects Sondrah is also being controlled. Once in the Nexus, all incarnations of the Doctor appear demanding to know who Sondrah really is. Meanwhile, back in town Clara gets Reynard on side and they go to Lacey. Reynard says that he saw the alien ship crash. They controlled his mind and forced him to lure Edison here. He’s hoped to use Hickok’s body to scare the |
| |
|  |  |  | | 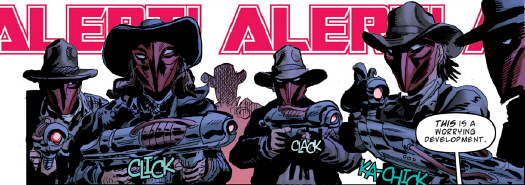 | | | townsfolk away, this saving many lives, but the townsfolk didn’t leave. Lacey plans to attack the ship, but Clara realises Reynard has slipped away. In the Nexus all the Doctors mount a spirited defence of their actions, but Sondrah recoils from the Tenth Doctor. The Eleventh reveals that this is all a diversion - he has given Wilde his sonic screwdriver and instructions for its use. Back in the ship, Wilde has done his work and the Doctor returns. He and Wilde rescue Edison and escape the ship. Clara and Calamity head out to a barn, the latter having received word of a sighting of Bill Hickok and they find him in an undead state. He reveals that Lacey’s cavalry is walking into a trap, and this is the truth - Lacey’s men walk into a massacre. The Doctor, Wilde and Edison run into Clara, Calamity... and Hickok. The Doctor unfeelingly diagnoses him as dead, which angers Clara as she knows how Calamity feels about Hickok. Back at the TARDIS, the Doctor releases Edison from mind control who tells them that Sondrah is building a portal to bring his race through to destroy the world and that the alien ship is protected by a barrier - if they got in before it’s because Sondrah wanted them to. The Doctor reveals that he plans to go through the portal and alert the T’keyn to Sondrah’s possession. As Lacey rides back into town, one of the few survivors of the massacre, Calamity spots a light in the Black Mountains - the portal is opening. Meanwhile, on the ship, the T’keyn validate Sondrah’s assessment of Earth and order its destruction. The Doctor tries to organise a defence for Deadwood and a way to get into the portal when they come under air attack. The Doctor grabs Wilde as he needs a good debater when he confronts the T’keyn. As he’s about to depart in the TARDIS he learns from Edison that Clara, Calamity and Hickok have gone to destroy the ship’s barrier housed in a barn. The TARDIS lands at the battle between the cavalry and the undead and neutralises the aliens’ weapons. At the barn, Hickok sacrifices himself to destroy the ship’s barrier. Now the TARDIS is able to land aboard the T’keyn mothership, and the Doctor and Wilde confront the T’keyn leader. Sondrah appears and the Doctor exposes him as Es’cartrss of the Tactire, the cranial parasite he defeated long ago (see here). However, it still takes Wilde’s eloquent defence of the Earth to overturn the sentence of destruction. The Doctor tries to help Sondrah but the parasite inside him is consumed with vengeance and the T’keyn drag him away. Back in Deadwood, the Doctor and Clara say their goodbyes and prepare to embark on journeys new. | | | ALTERED VISTAS SAYS:
As you might expect from Mike Collins, the artwork is immaculate and the likenesses of the Doctor and Clara excellent, and Charles Kirchoff does his usual superb job of adding colour that in turn adds atmosphere. The story is intricate and engrossing with some fantastic characterisation and a genuine sense of jeopardy. All of the Doctors appearing? Well, okay, as this is the final strip proper and a nod back to The Forgotten, I can forgive it and even enjoy it for its witty characterisation, and bringing back the enemy from that strip makes perfect sense in the circumstance and works well. This is definitely the best the IDW strip has ever been through all of its six years of publishing Doctor Who strips.
|
|
 | | |  |
 |  | | THE GIRL WHO LOVED DOCTOR WHO |
 | | | 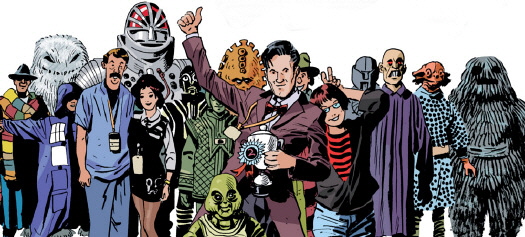 | | | SCRIPT: Paul Cornell
ART: Jimmy Broxton
LETTERING: Shawn Lee
EDITOR: Denton J. Tipton COVER DATE: December 2013
ON TV: The Time of the Doctor
IN DOCTOR WHO ADVENTURES: Dragon Attack - By the Book
IN DOCTOR WHO MAGAZINE Welcome to Tickle Town
REPRINTS: None The TARDIS falls into a parallel universe. Stepping out the Doctor is besieged by autograph hunters awaiting location shooting, but poor bullied Ally can’t believe what she’s seeing and follows him. When he confronts her she refuses to believe that he’s the Doctor. She’s twelve-years-old and knows that he’s Matt Smith and that it’s all a TV programme. Taking him home, she shows him DVDs of his adventures and he ends up attending a convention with her and her mother where he wins second place in a ‘cosplay’ competition. Allys mother confides in the Doctor, telling him that she thinks Ally is being bullied. He meets Matt Smith and gets Ally his autograph and tries to discover how to escape this world but Smith won’t give out any spoilers. However, Ally shows him that the series does continue, so he must escape. The Doctor attempts to address her being bullied, but Ally denies it. Later he does a scan for alien technology and finds a Cyberman in Ally’s wardrobe. They run. It is a Cyberman from the battle at Canary Warf, which fell through to this reality - creating the hole the TARDIS fell through. The Doctor downloads with his sonic the Cyberman’s experimental dimensional compass, allowing him to return home, and tries to offer the Cyberman a deal, but it refuses to comply. Pursued by the Cyberman, the Doctor and Ally run back to the location shoot and steal the final pages of Matt Smith’s script, so the Doctor can send the Cyberman back into the void. The Doctor recommends an actor called Peter Capaldi for the part of the Doctor before departing. Ally deals with her bully using her brains... and a little bit of running away. |
| |
|